For the second post in this series, let's first take a look at the (functionality of the) end result before we go deep-dive into the technical details. This was put in place after months of hard work by a number of people.
The intermediate, not-so-successful, versions will get a honorable mention in the next posts!
In the lifecycle of a Teams team, the ending is handled rather good by default: Group Expiration Policy and Retention Policies for Teams. The former helps clean up inactive teams after a specified amount of time (in our case 1 year) by automatically deleting it, unless an owner extends the lifetime with another year.
The latter keeps the content of a team for the specified amount of time, for eDiscovery purposes.
On the other hand, the start of a new Teams team and the "run" experience during the lifetime of a team is pretty basic. The default creation form asks for a title and a description, and that's about it.
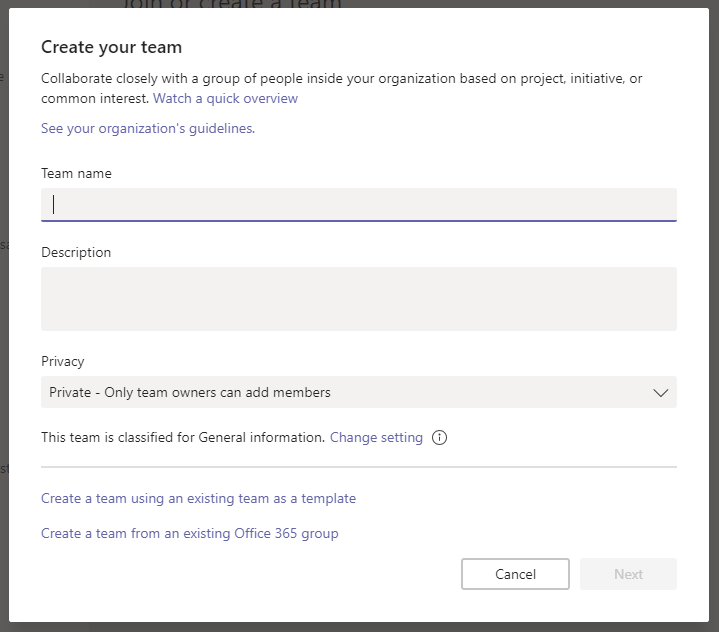
While this might be sufficient in most cases, in this project we wanted to control and extend the creation of new Teams. That's why we developed a custom Teams application that runs partly in the personal scope and partly in the teams scope.
When a Teams application is configured for the personal scope, it shows up behind the three dots in the left side navigation pane. The app displays information that is scoped to the logged in user.
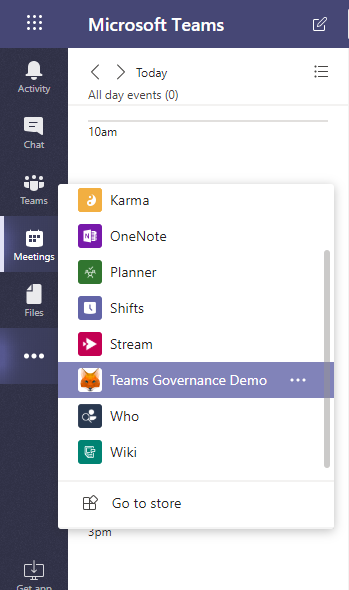
Our application (named Teams Governance Demo in the image above) serves two big purposes for our users:
- allow self-service provisioning of new Teams, while still allowing some control for administrators by asking for additional metadata
- improve on the discovery of existing Teams, by using the provided metadata for search and filtering capabilities
The provided data helped our admins with improved reporting on and management of teams, but more on that in a later post dedicated to reporting.
Requesting Teams
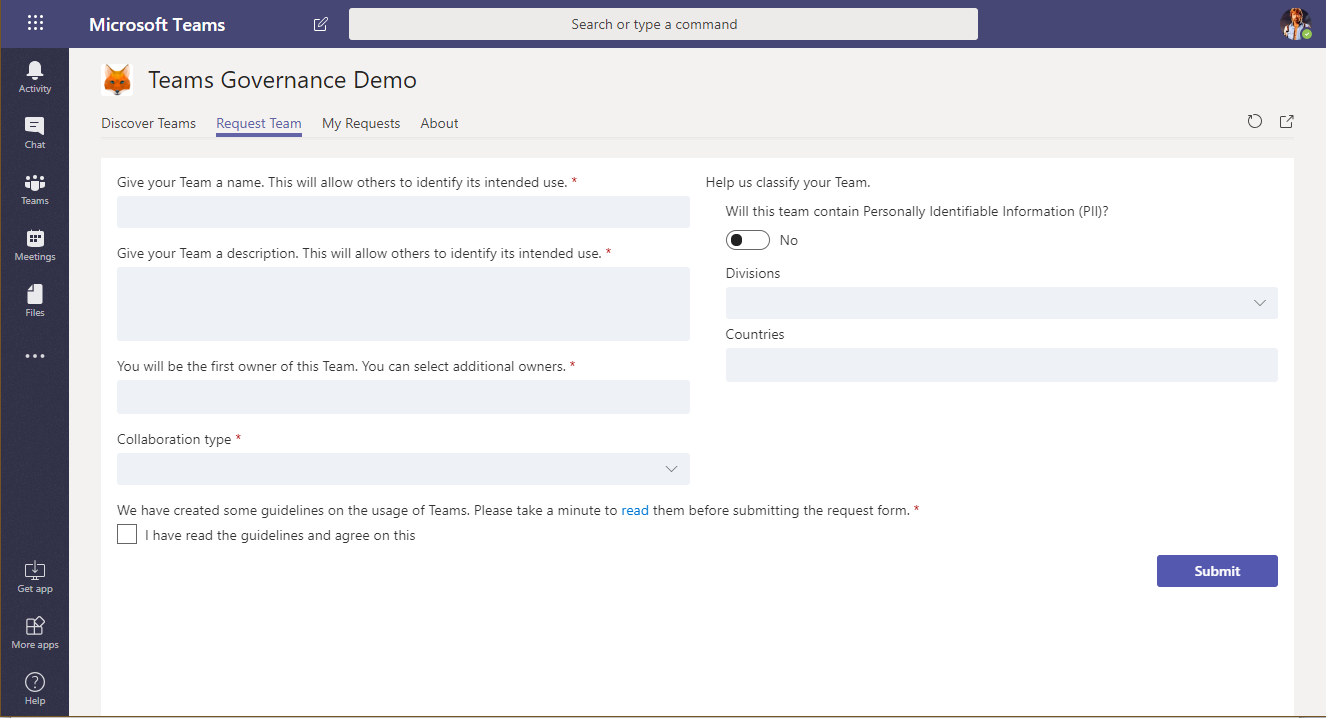
Users that need a new team can request it with this form. It asks for the defaults like Title and Description but it applies some custom naming conventions. We also ask for some additional metadata: type of collaboration, relevance to users of specific divisions or countries, contains PII, ...
The requesting user will be the first Owner of the Team, and the form asks for an additional one to comply with the policy of having at least two owners.
The type of collaboration is linked to templates of Teams, so depending on the selected type the resulting Team will have different settings and channels.
Requesting users must also confirm that they have read the Corporate Guidelines before they can submit their request.
After submission, they can follow the status of their request on the My Requests page. The page provides free text search to quickly find the request, or the page can be refined with the metadata-based filters or the status filter. The filter pane is collapsed by default.
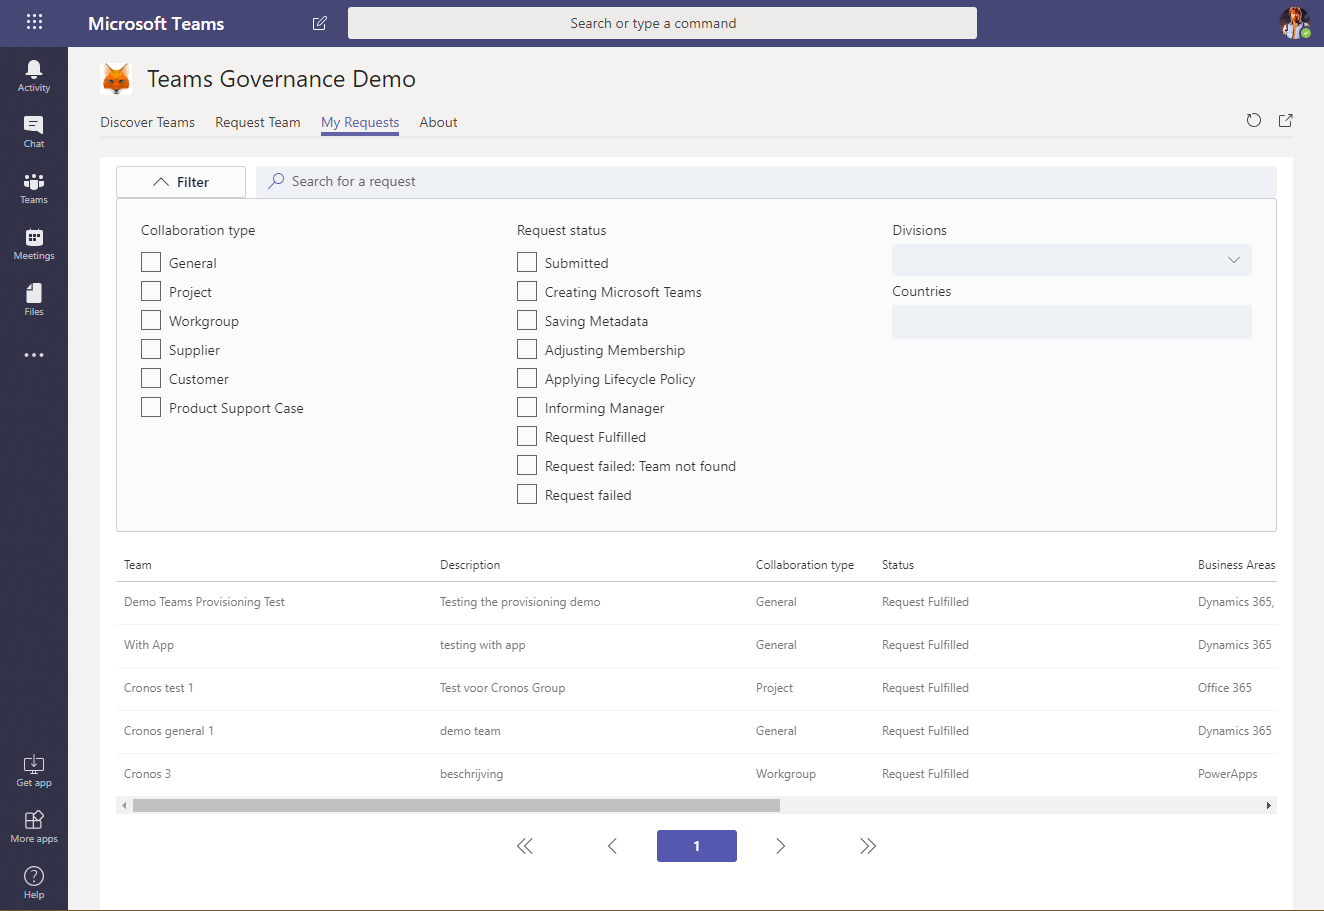
A submission gets processed automatically, without approval, and creates a Team. The creation process informs the manager of the requesting user, applies the expiration policy and saves the metadata.
Discover Teams
The default Join Team experience wasn't cutting it for our users. At the time, it only showed public Teams (but not always all of them) and the filtering options are very limited. Since we were expecting to have at least 15 000 users and several thousands of Teams in the first year, we created our own Discover Teams page.
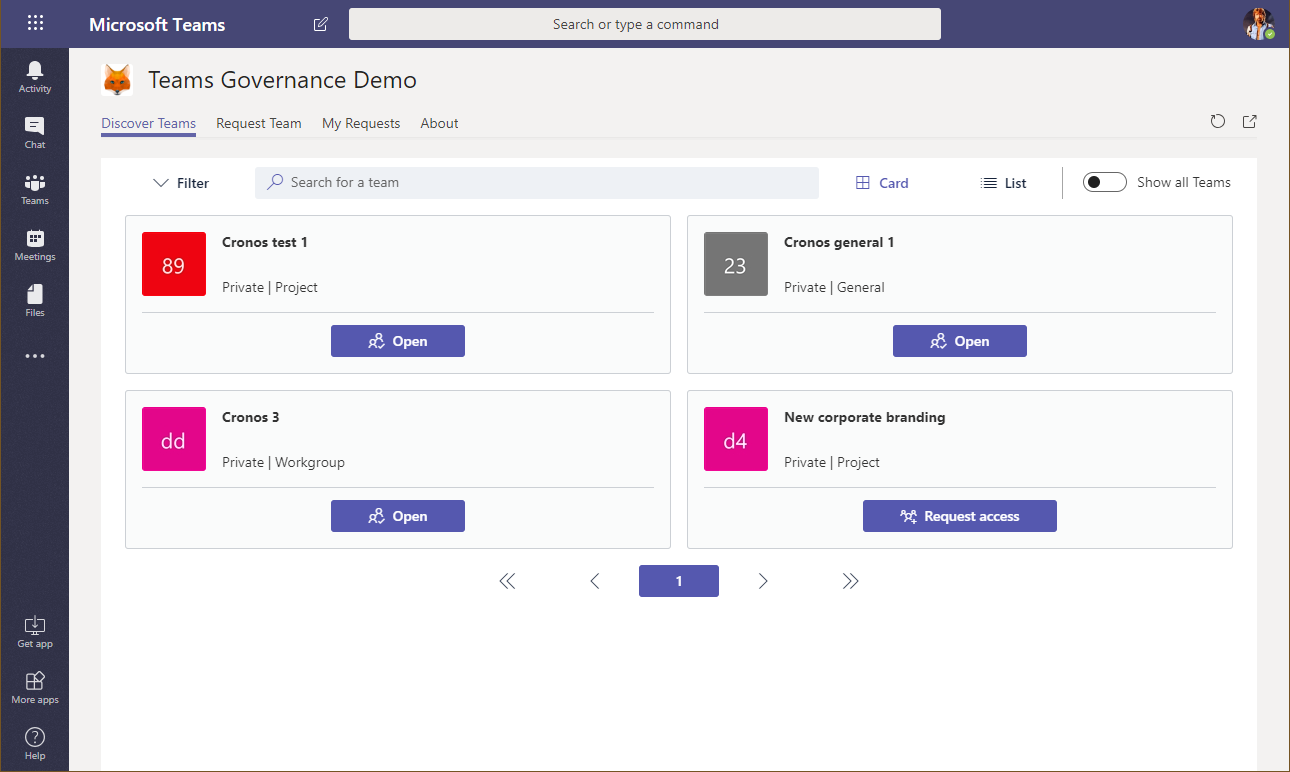
It shows all the available Teams in the organization. The user can Open teams (because they are already a member or the Team is public) or they can Request Access (because the team is private).
The view itself can be limited to only show Teams to which the user already has access and switched to a list view, instead of the cards view.

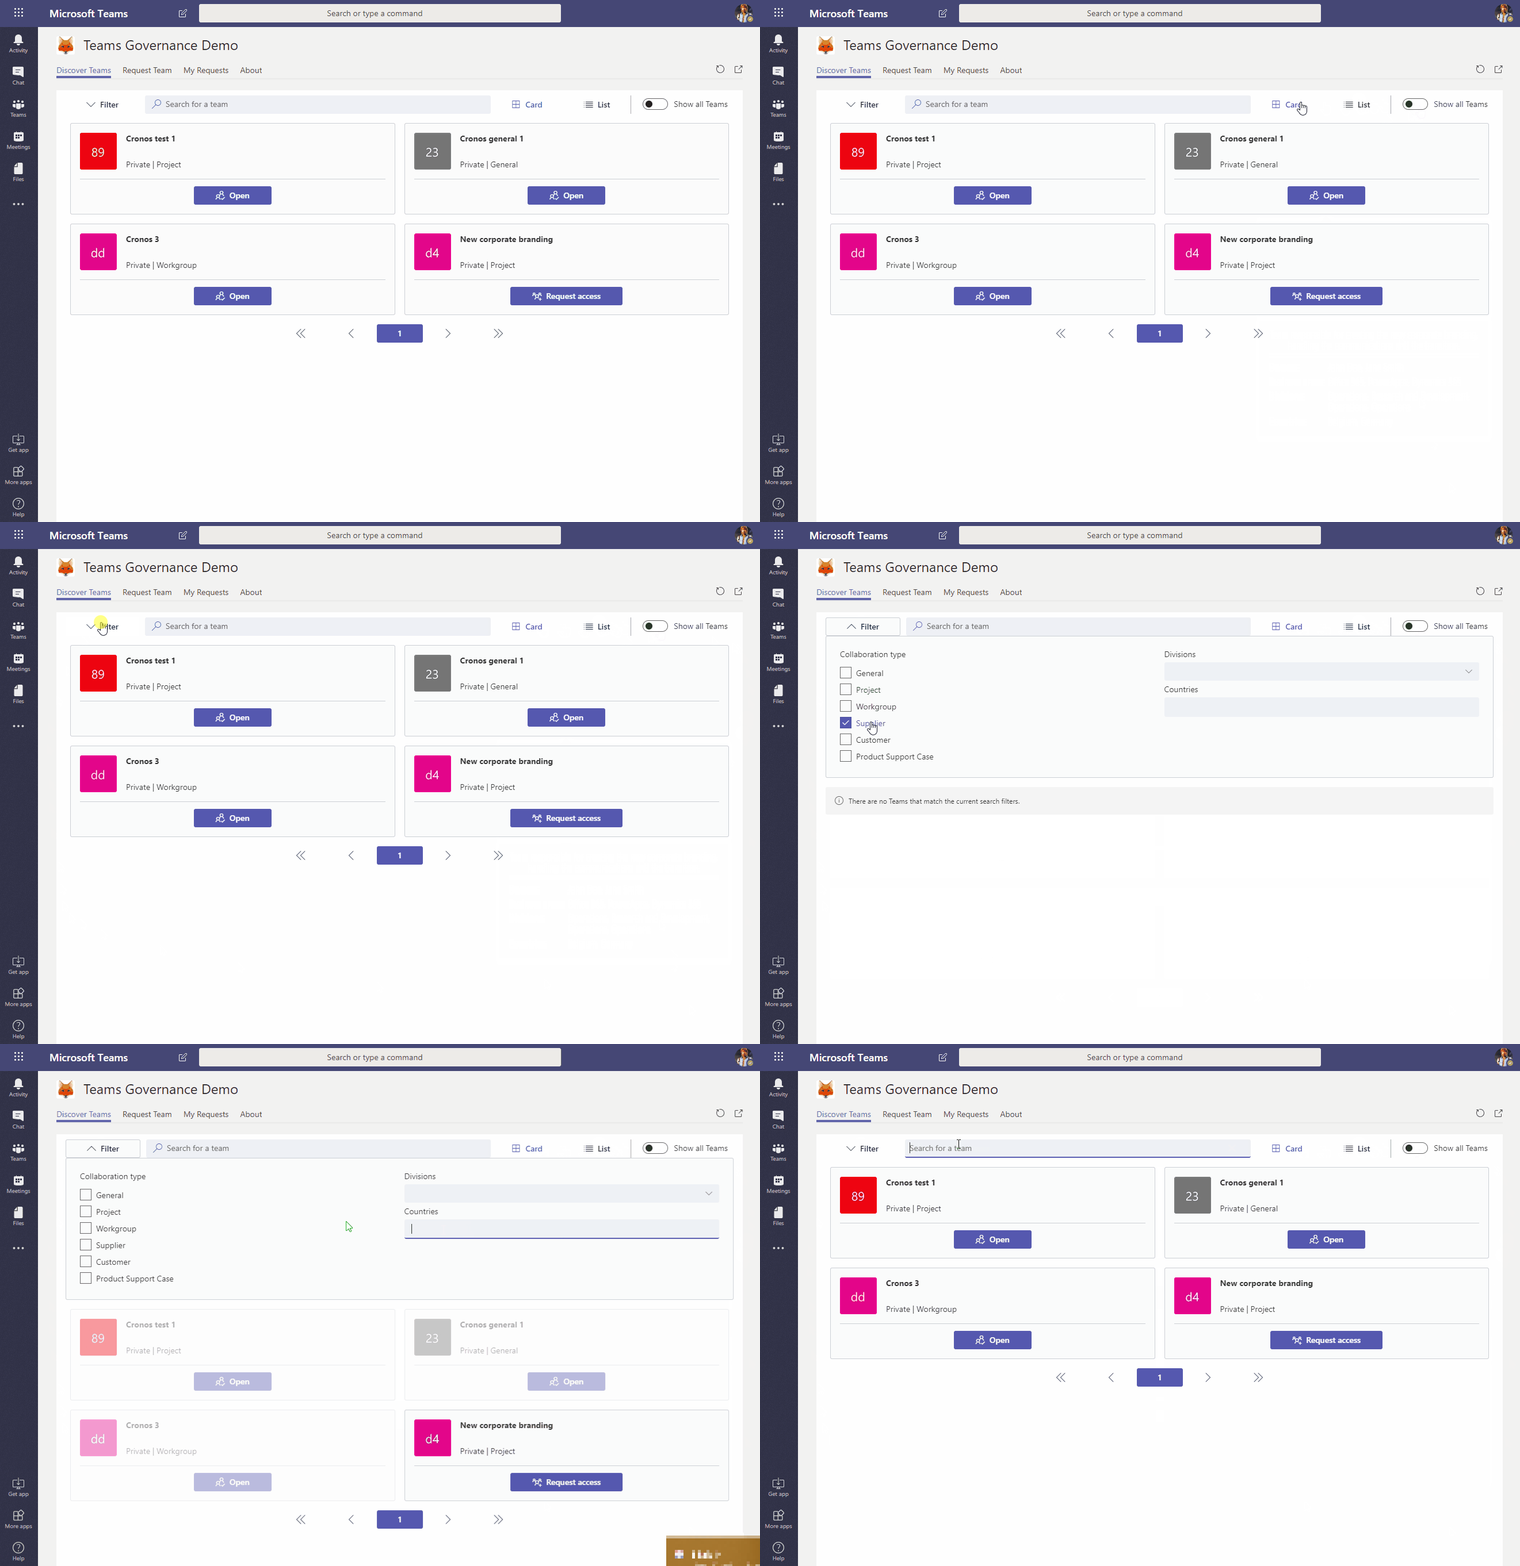
Of course, both views offer the same functionality regarding free text search and filtering on the metadata:

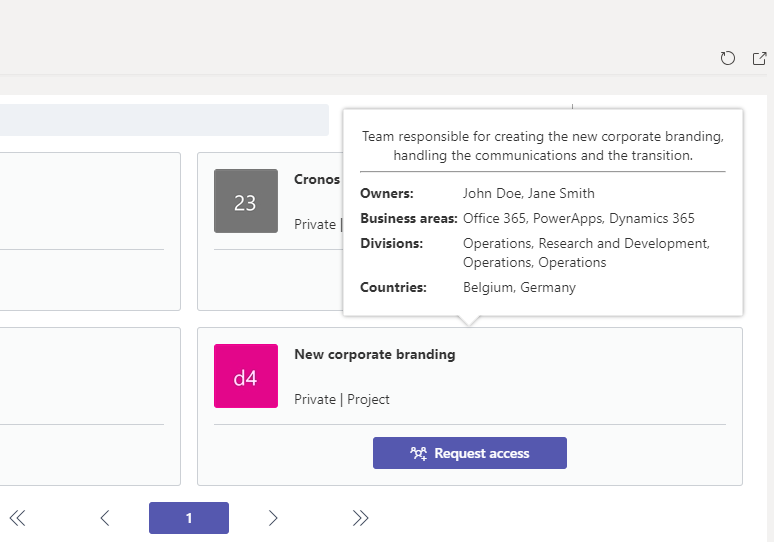
Hovering over the card of a specific Team shows a pop-up with the description and the additional data that was captured during provisioning.
The following animated gif shows how the discover page works, with the filters and the free text search.
Team Information
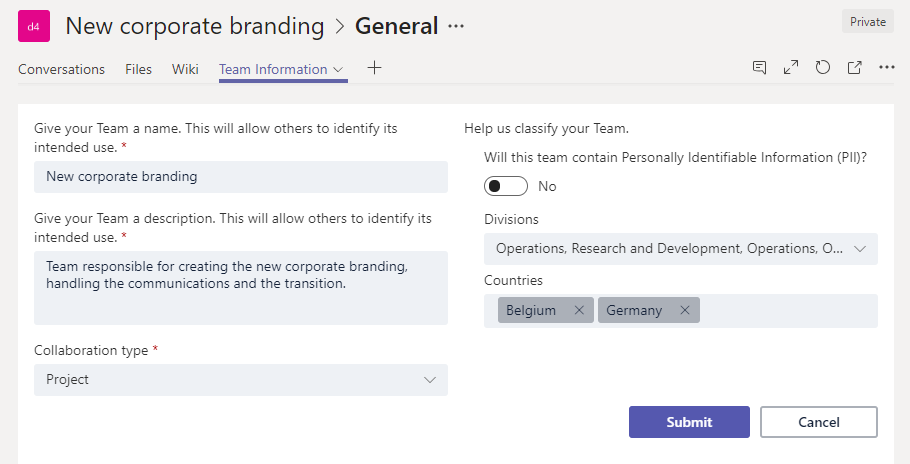
In addition to the personal scoped app, there was also a small portion created as a team scoped app. This app was added as a tab in the General channel of each provisioned Team, and shows information related to the Team.
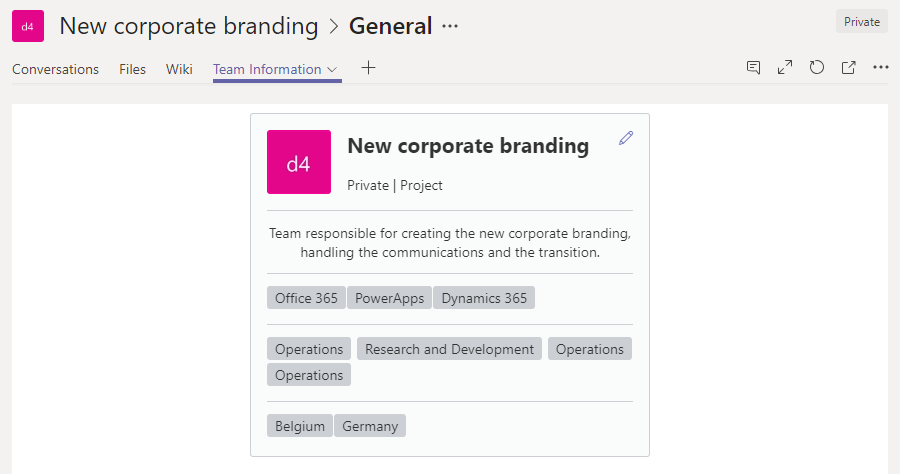
It shows the metadata that was provided with the request for the Team, and it allows the Owners to make changes to the metadata.
Conclusion
The investment made into designing and building this application was worth it:
- The new request form and the discover experience limits Teams sprawl, because users can more easily find if a similar Team already exists.
- The additional metadata increased our reporting capabilities (more on that later)
- It didn't add overhead for the users, no delays in creation and they can be immediately productive
The next posts will go deep-dive into the technologies used to develop this application, so keep reading ;)
This post is part of the series Automate governance in Microsoft Teams:
- Context and Goals
- The Result [this post]
- Implementation, v1
- Implementation, v2
- Reporting
- Improvements and Wishes
