
This week I needed to execute some actions against an Office 365 environment from within a YAML-based deployment pipeline in Azure DevOps, naturally PnP PowerShell and CLI for Microsoft 365 came to mind as the perfect toolset.
I absolutely wanted to avoid username/password authentication, as the account would require Global Administrator permissions to execute the commands but couldn't have multi-factor auth applied and that could pose a major security risk. I decided to use Service Principal authentication with my own Azure AD app, but I also didn't want to keep my certificate in the repository.
Luckily, all of this can be achieved with an out of the box functionality in Azure DevOps: Variable Groups. A Variable Group can be connected to a Key Vault and can connect the secrets & certificates in there to variables in your pipeline. All of this happens securely in the backend and your secret/certificate will never be exposed, not even in the logging of the DevOps action.
Let's see how that works!
Preparation
Service Principal & Service Connection
I usually create one Service Principal in my customers Azure AD for my DevOps automated deployment pipelines, called "{MyCompany} DevOps Pipeline". This one is used to create the Service Connection to the Azure environment of my customer so we can install the application from our DevOps pipelines. More information about creating this Service Principal for a Service Connection can be found on the Microsoft Docs website.
Extend Service Principal for Office 365 connection
I decided to reuse that existing Service Principal and use it for my connection to Office 365 from the pipeline as well. I need to make some changes in https://portal.azure.com to my Service Principal for this to work.
Go to Azure Active Directory -> App registrations and find your app in the list. After opening it, in the left navigation find API permissions. Depending on the actions you want to execute you have to add some permissions in here to signify that your DevOps pipeline is allowed to do these actions. Since I want an unattended run, I had to choose from the Application scopes:
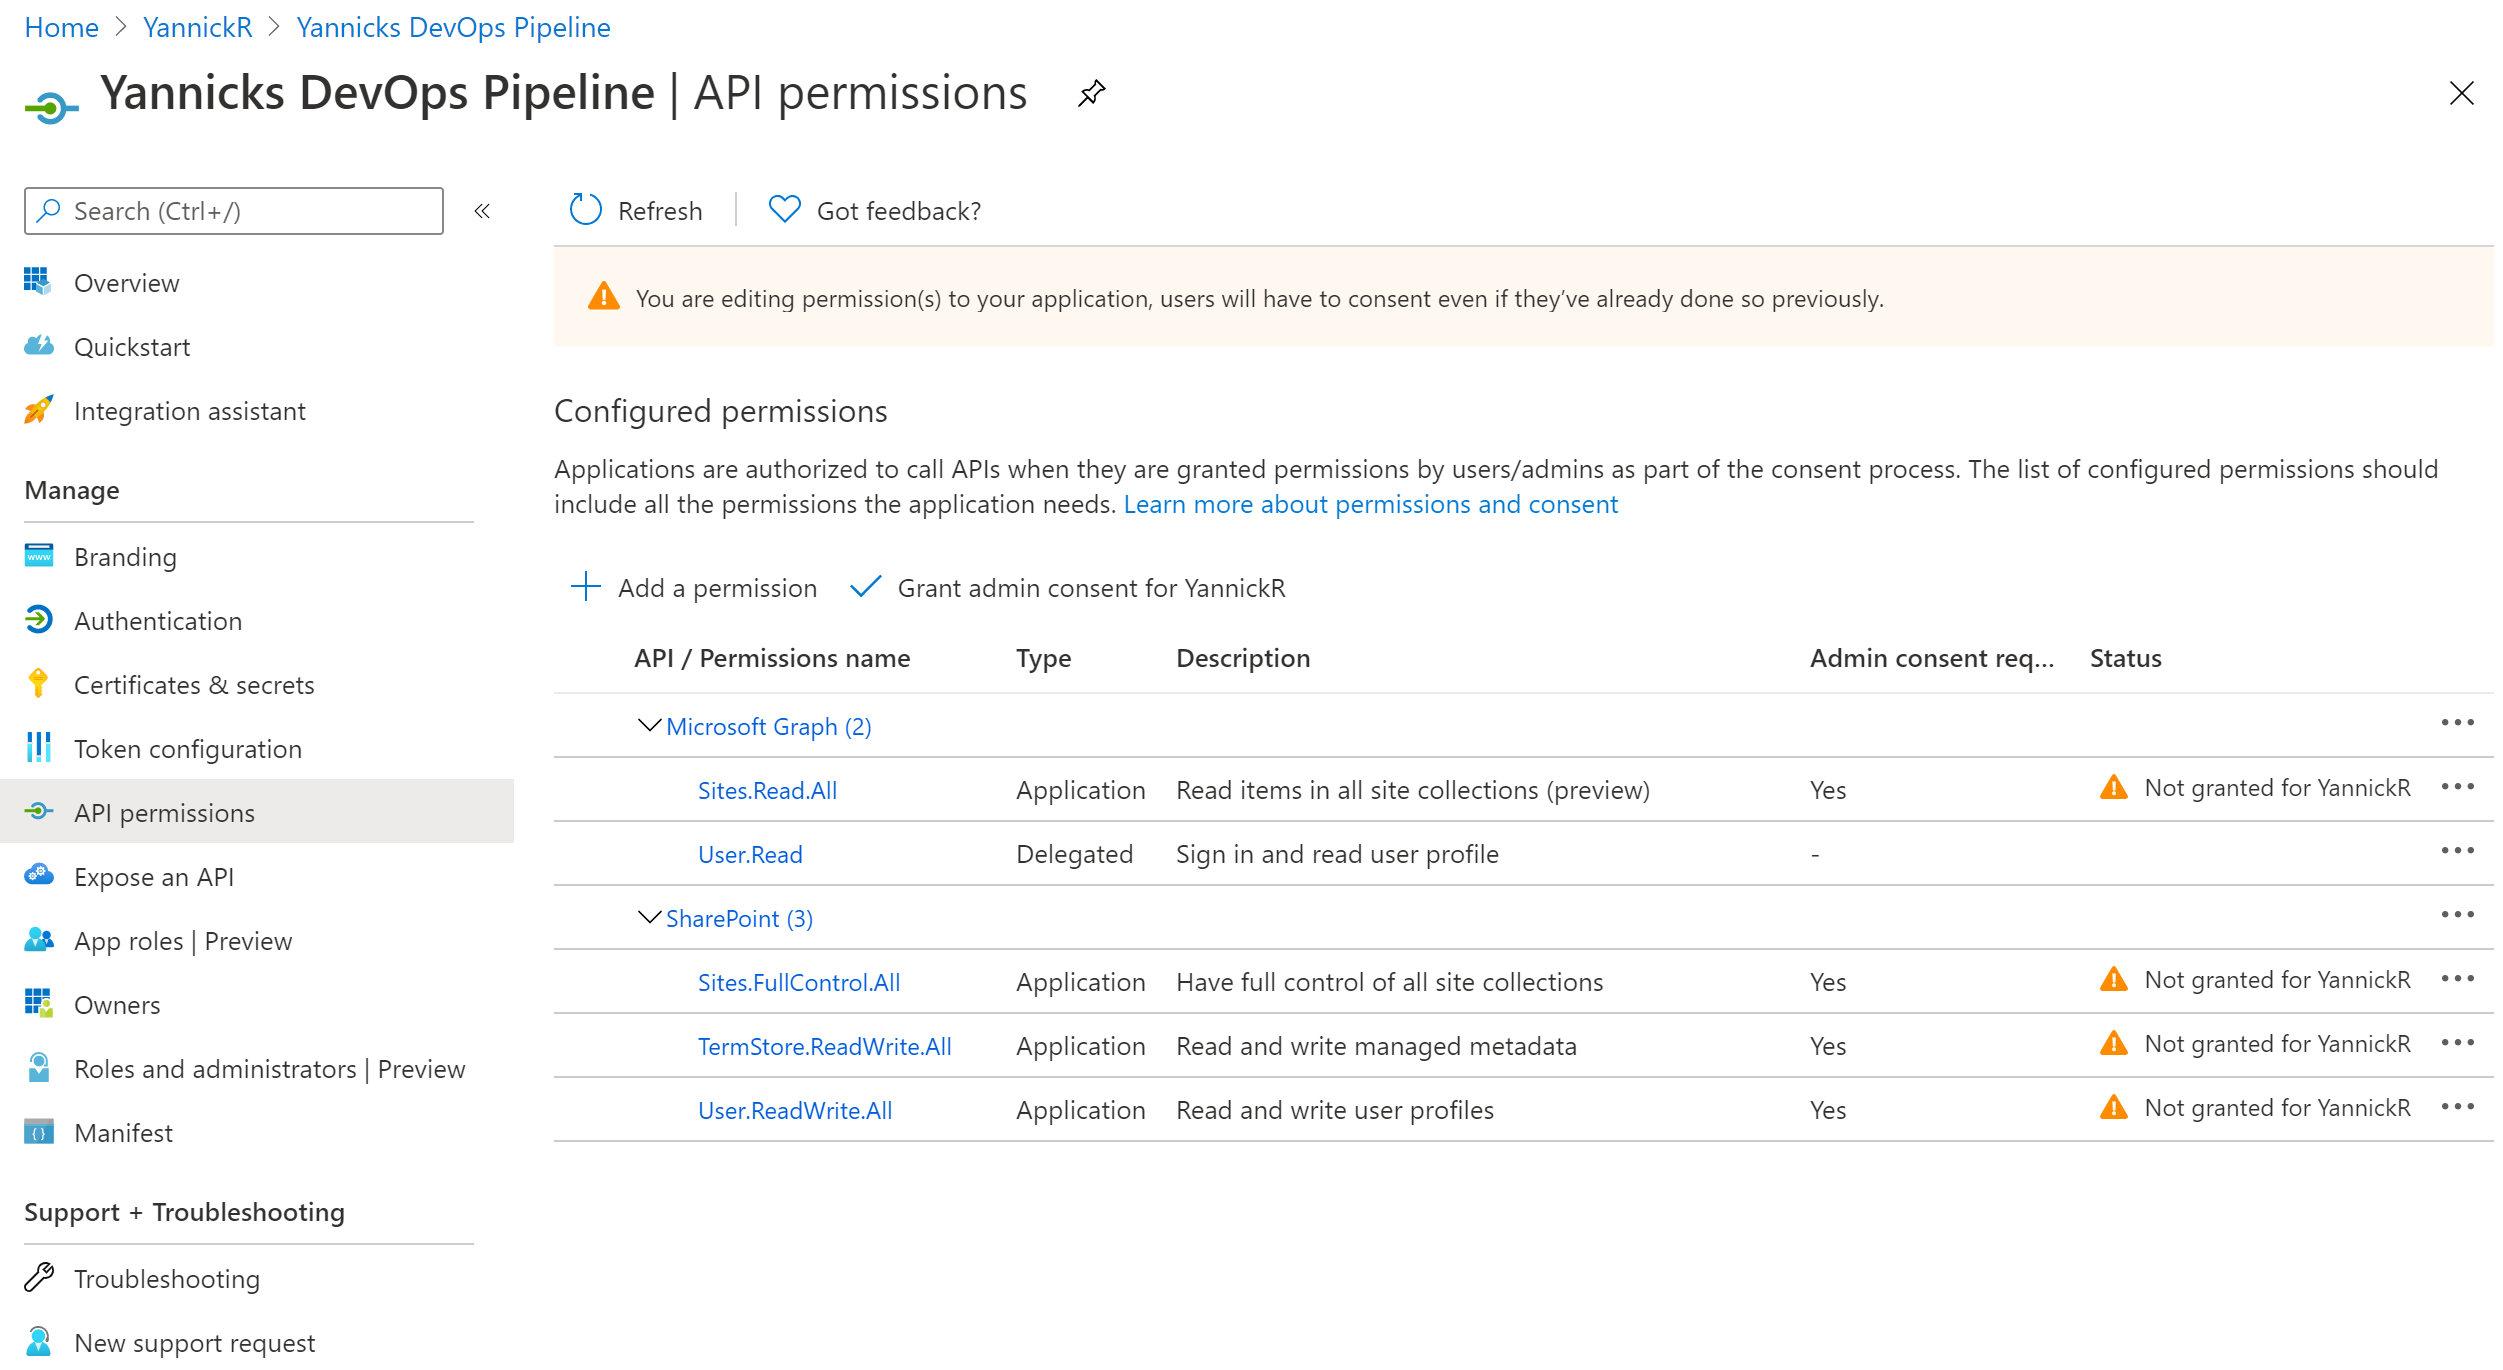
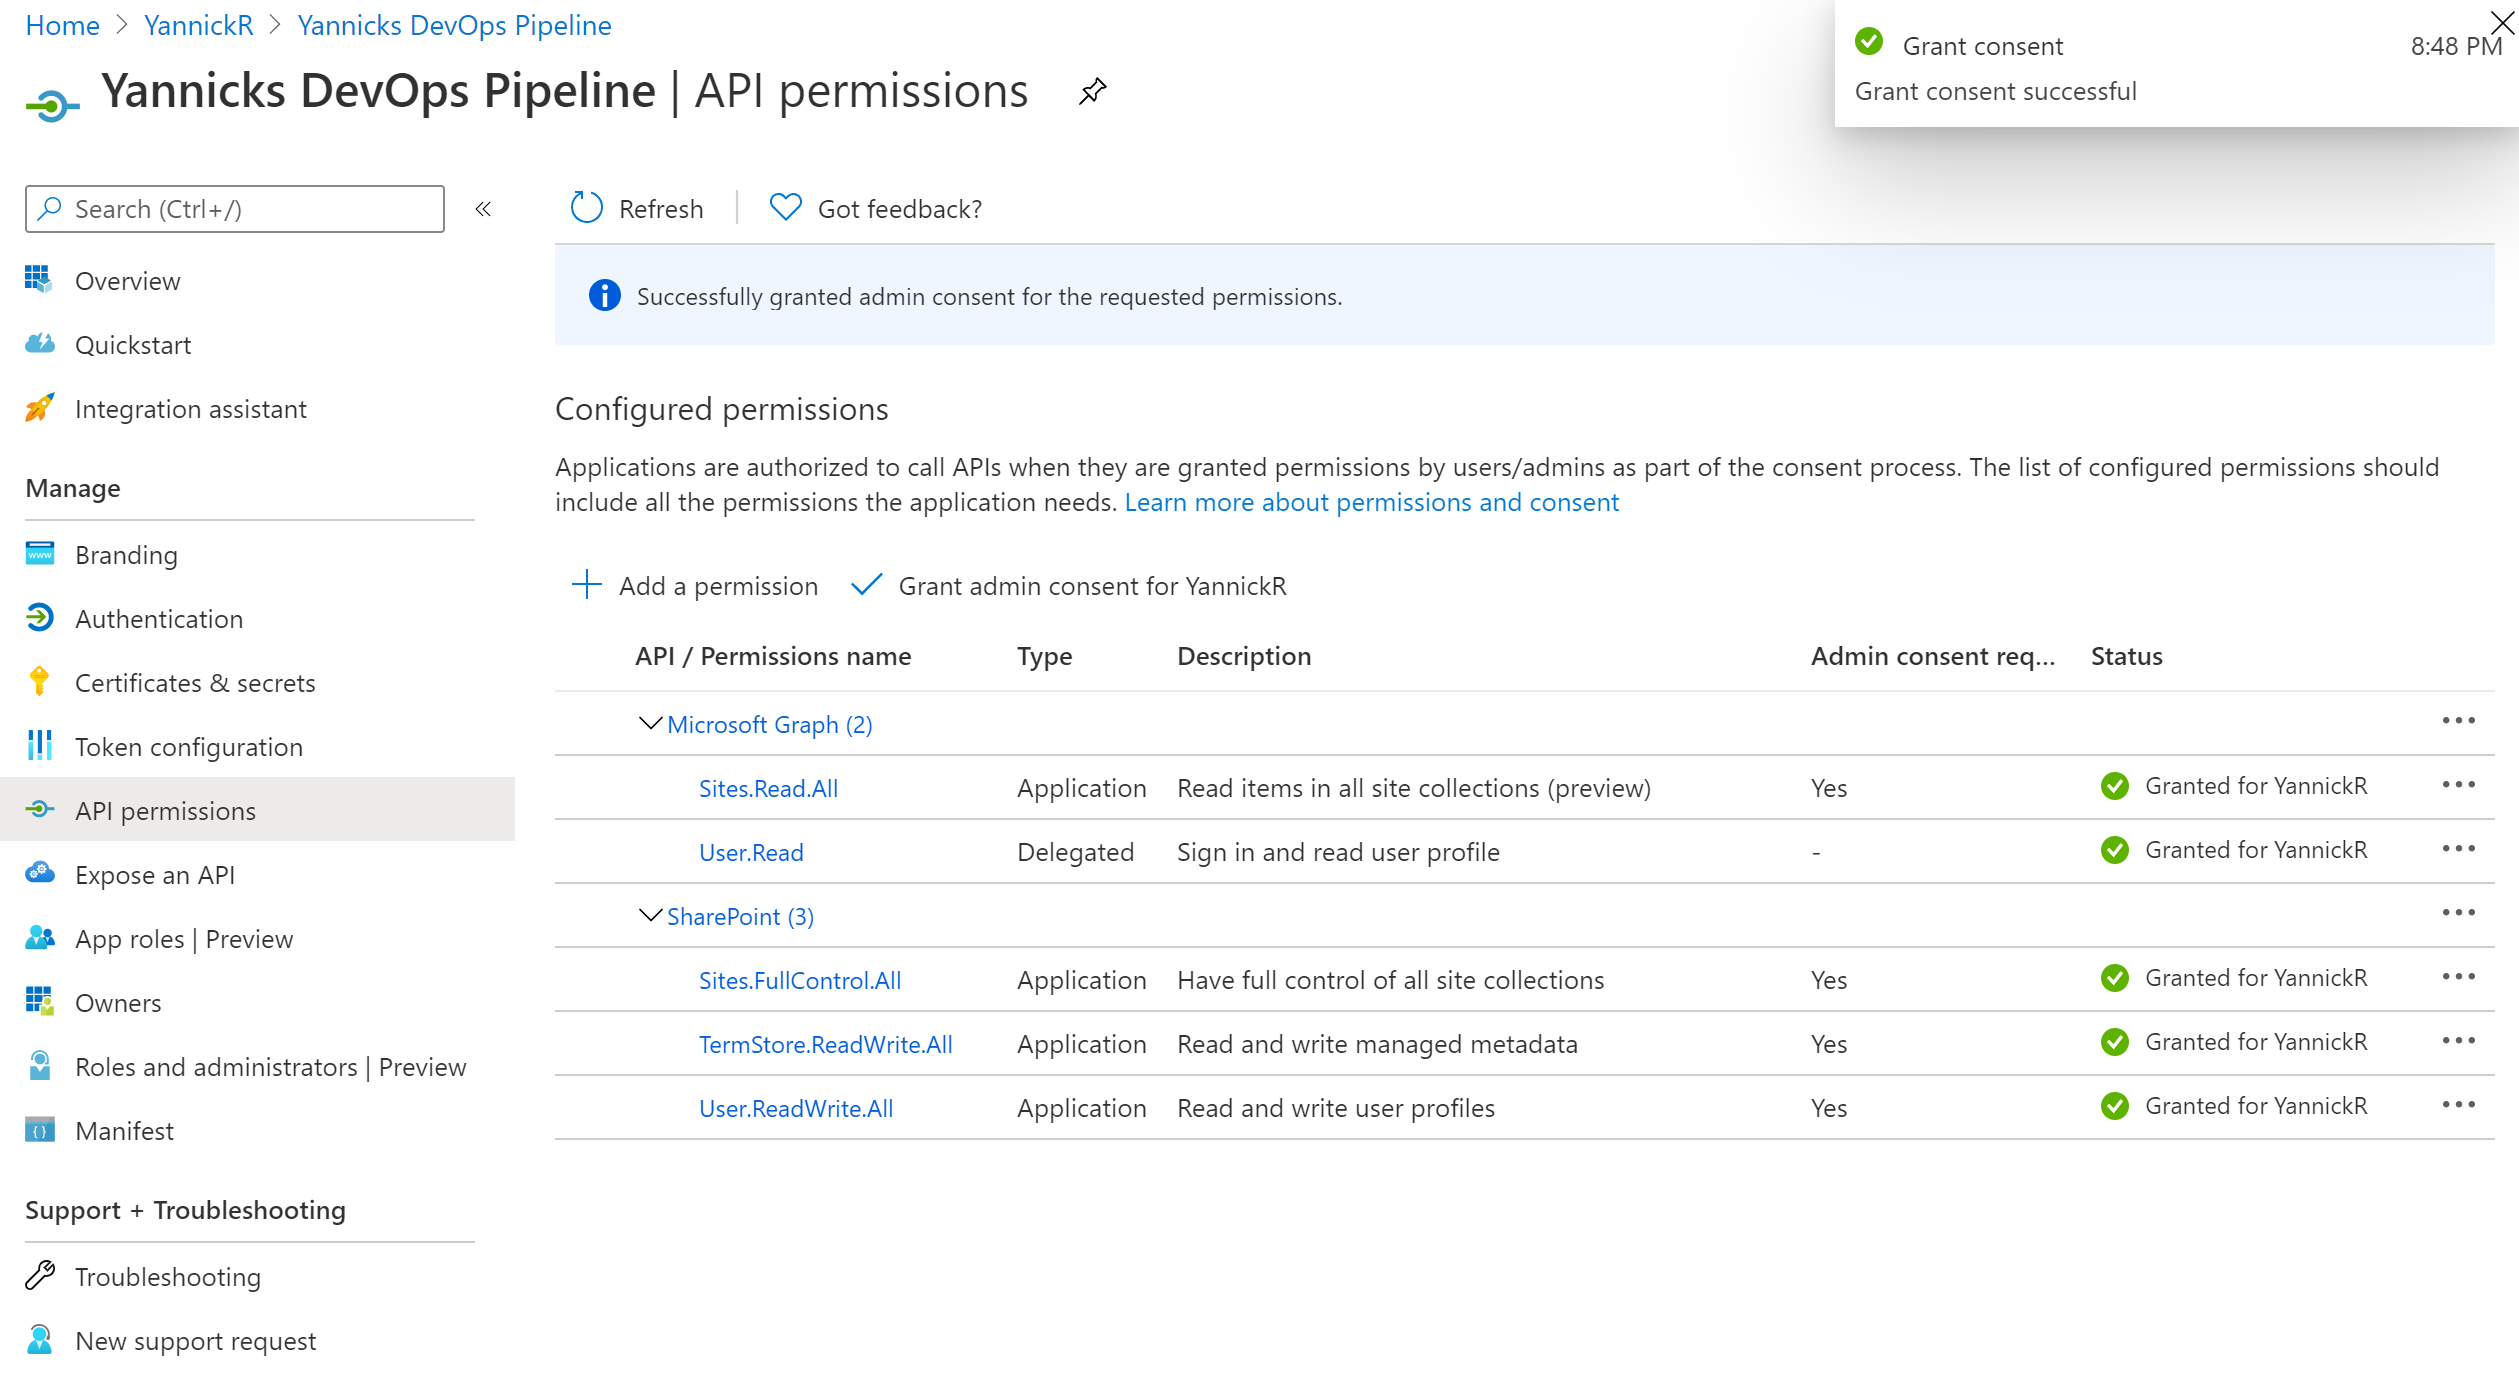
Make sure you hit the "Grant admin consent for {Your Organisation}" button to actually allow all the permission scopes. The status should turn green for all of them:
Key Vault
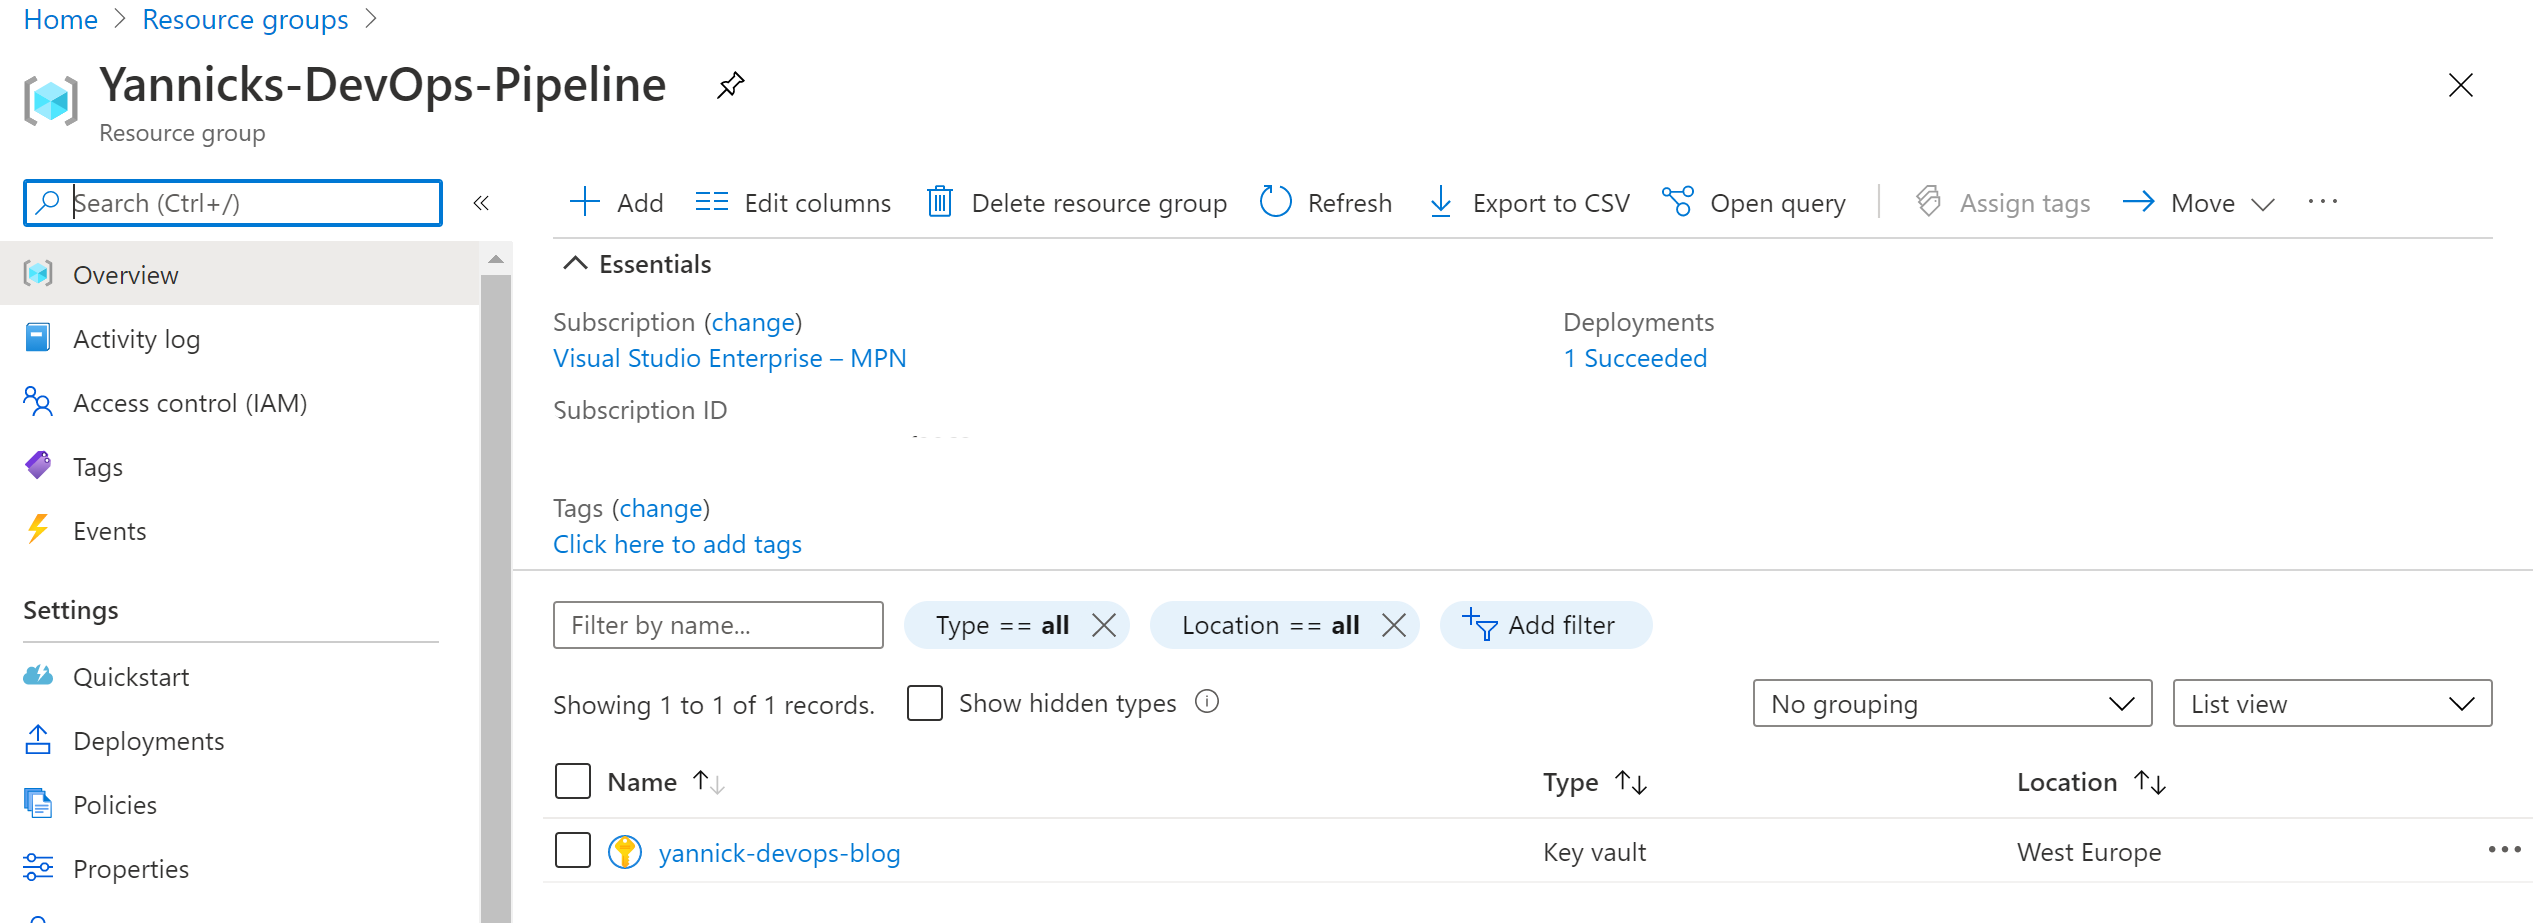
Secrets and certificates need to be stored securely in a Key Vault. I either reuse an existing Key Vault that contains some other shared secrets already, or I create a new one in a new resource group called "{MyCompany}-DevOps-Pipeline":
Next up: allow our Azure AD app to access the secrets in this Key Vault. Select "Access Policies" (NOT Access Control) in the Key Vault management pane and add an access policy:
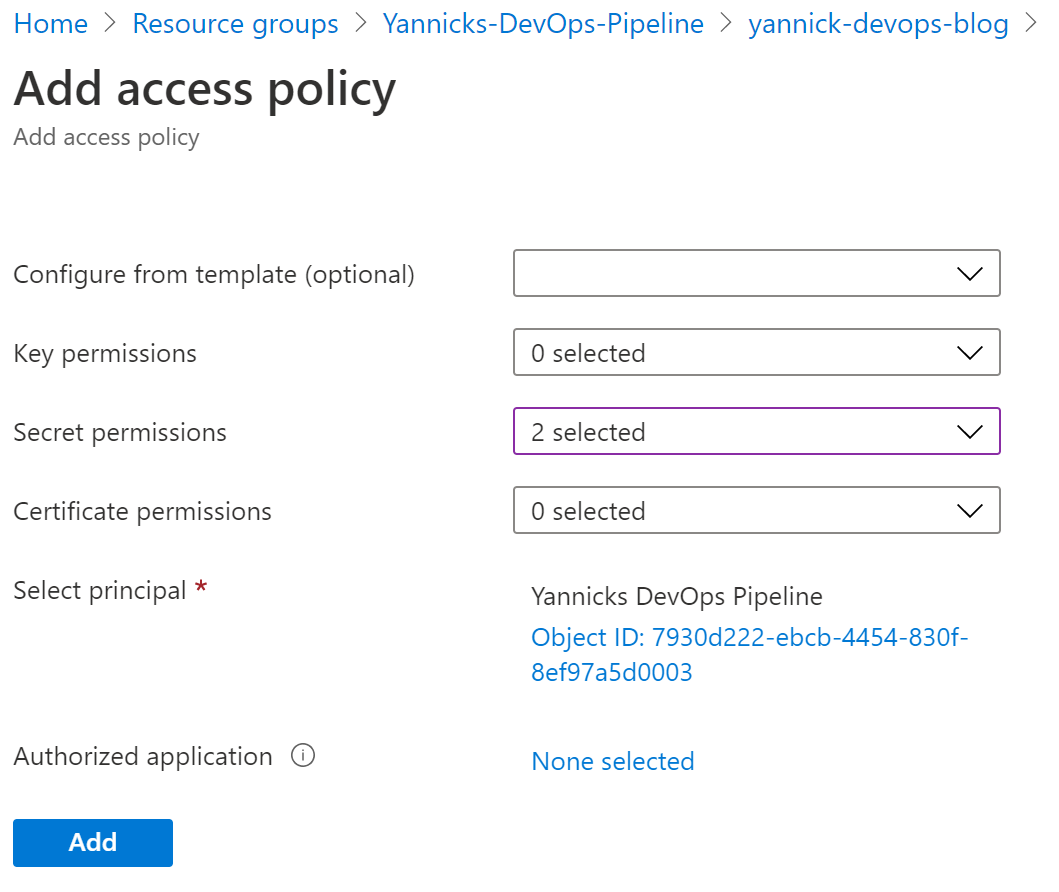
Select Get and List for Secret permissions, and next to "Select principal" you choose the Azure AD application we extended in the previous step. Click add.
Don't forget to click Save in the following screen, or nothing of the previous steps get actually saved:
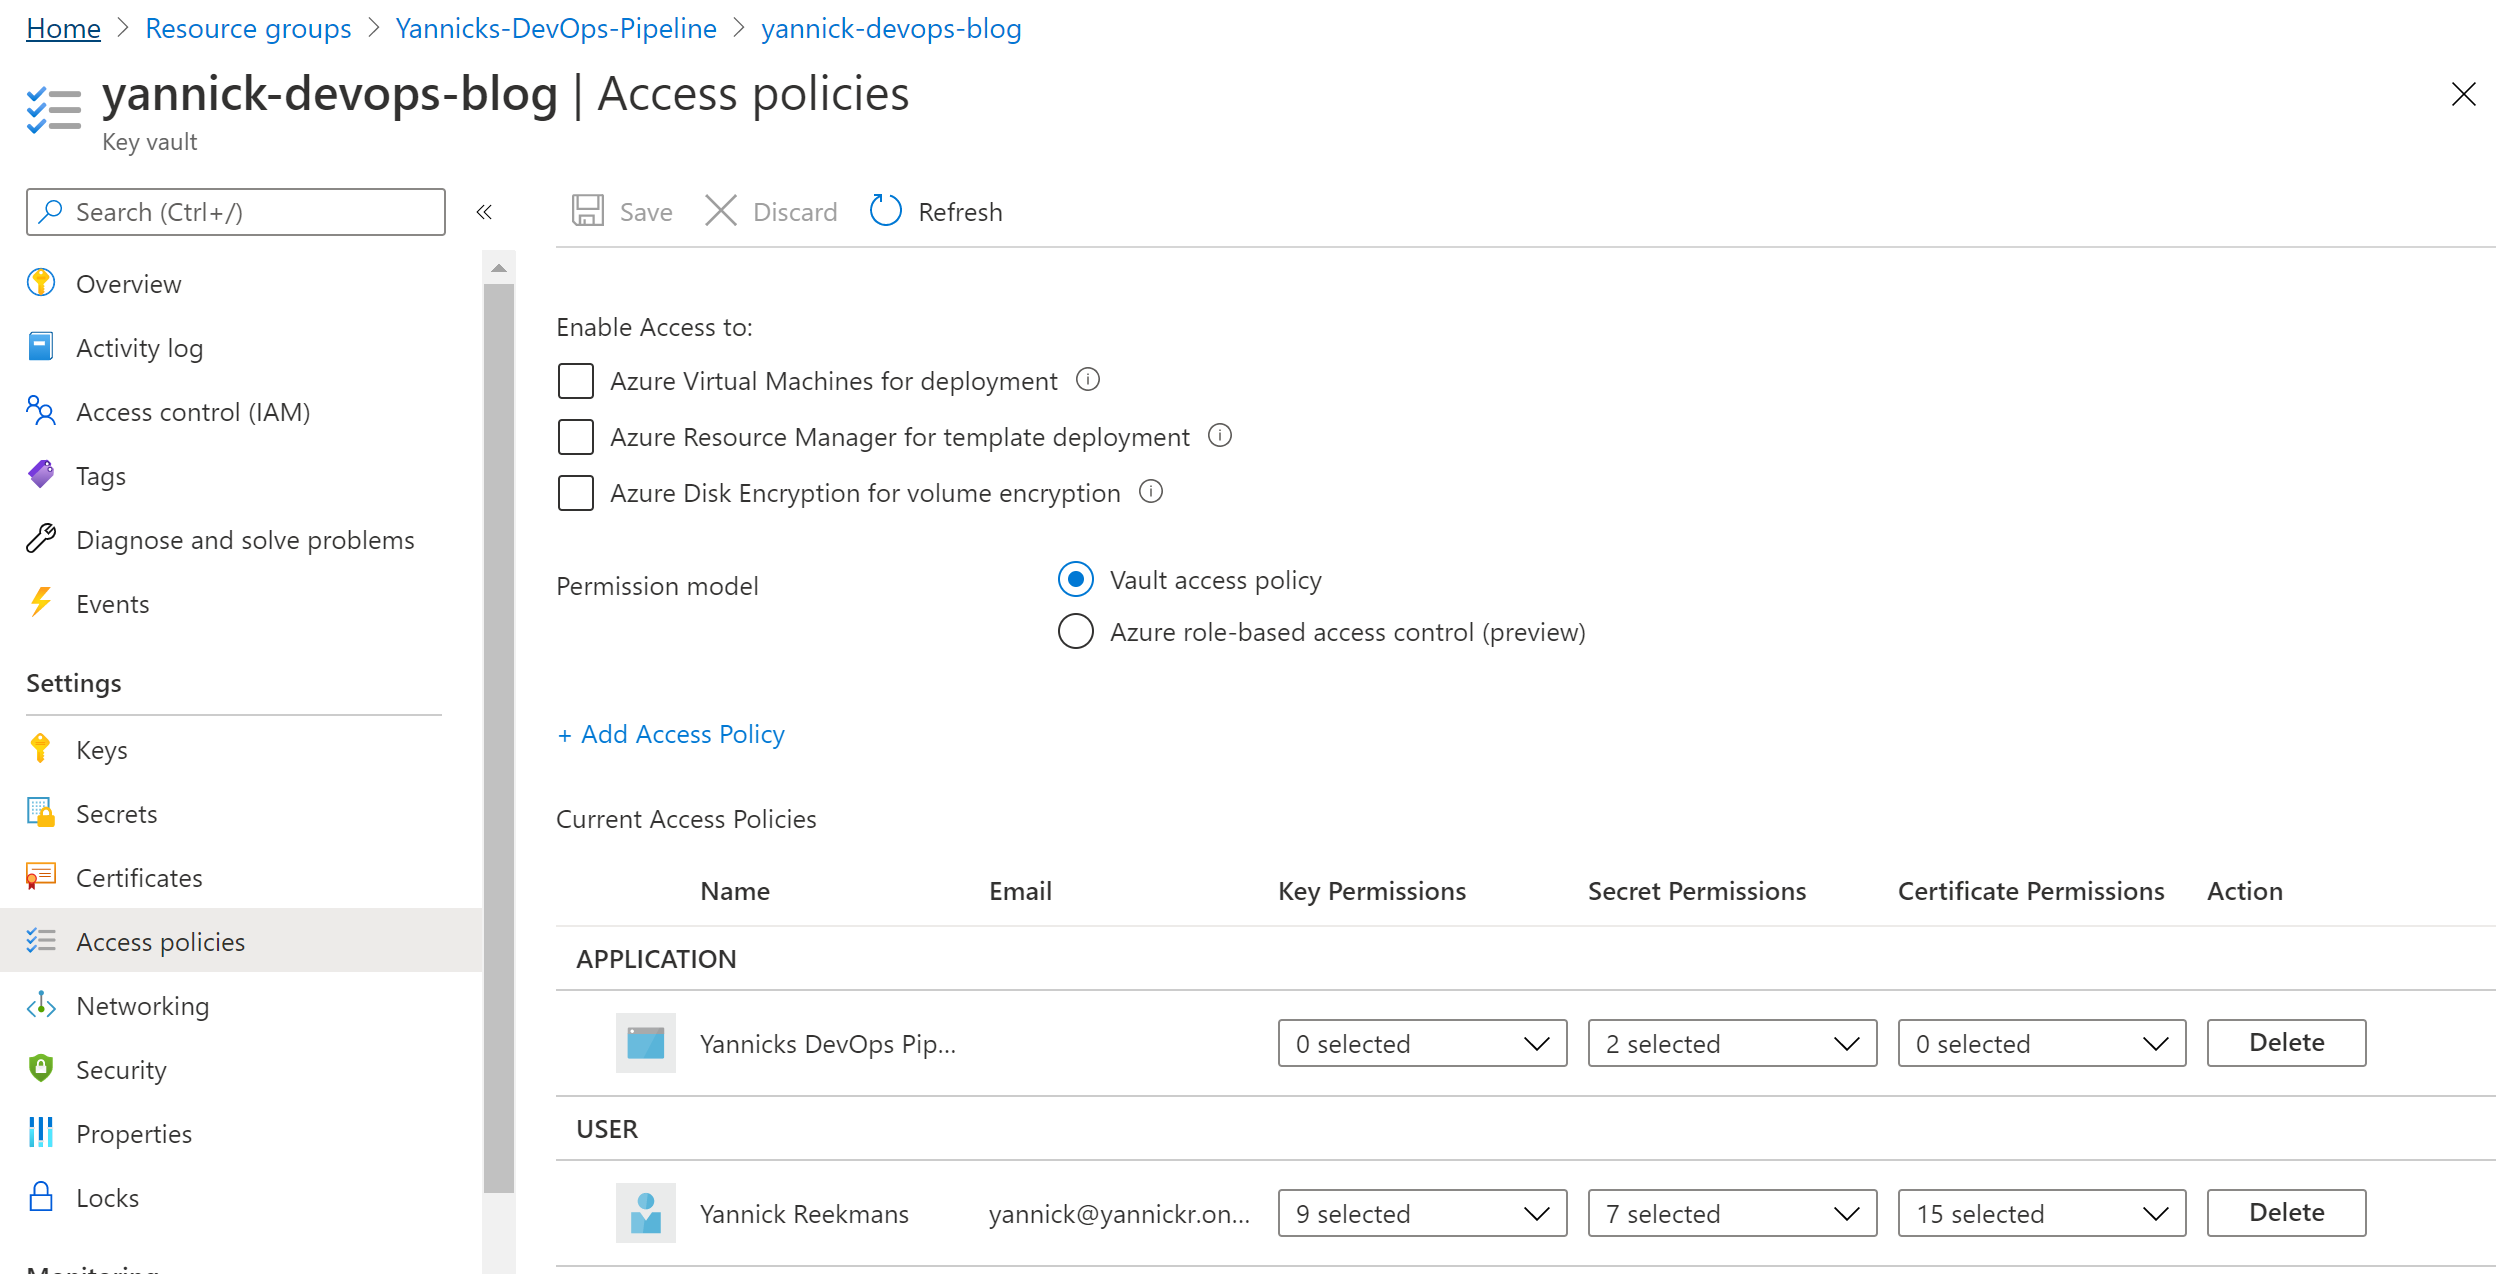
Now the Azure AD app can read all the secrets from your Key Vault!
Certificate
I wanted to do App-only authentication to SharePoint and since this is only allowed through the Client ID/Certificate flow, I also need a certificate. If you'd only connect to Microsoft Graph you could get away with using just a Client Secret.
There is an easy way and a hard way to get this type of self-signed certificate. In the hard way you'd generate it locally from the command prompt, but in the easy way you just let the Key Vault create one for you:
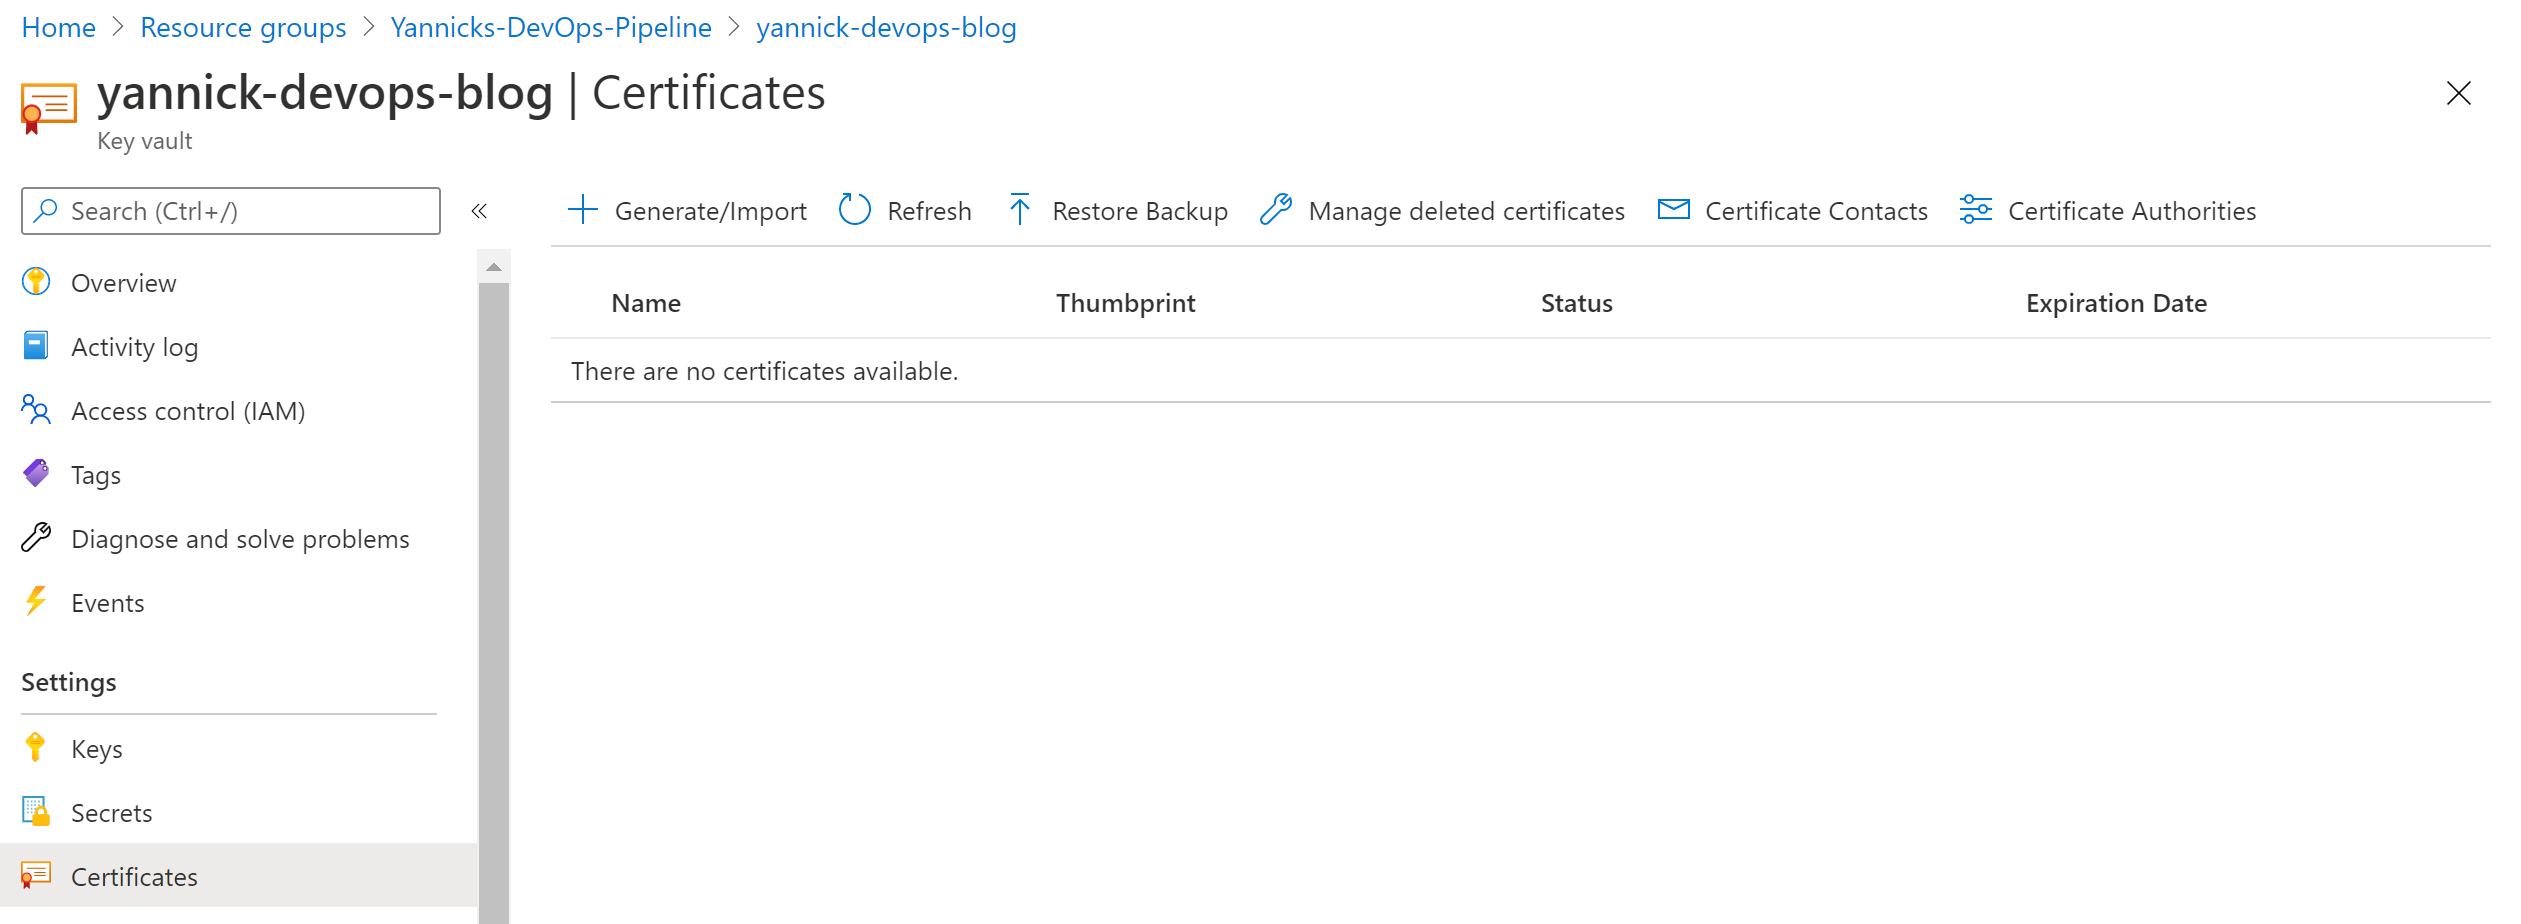
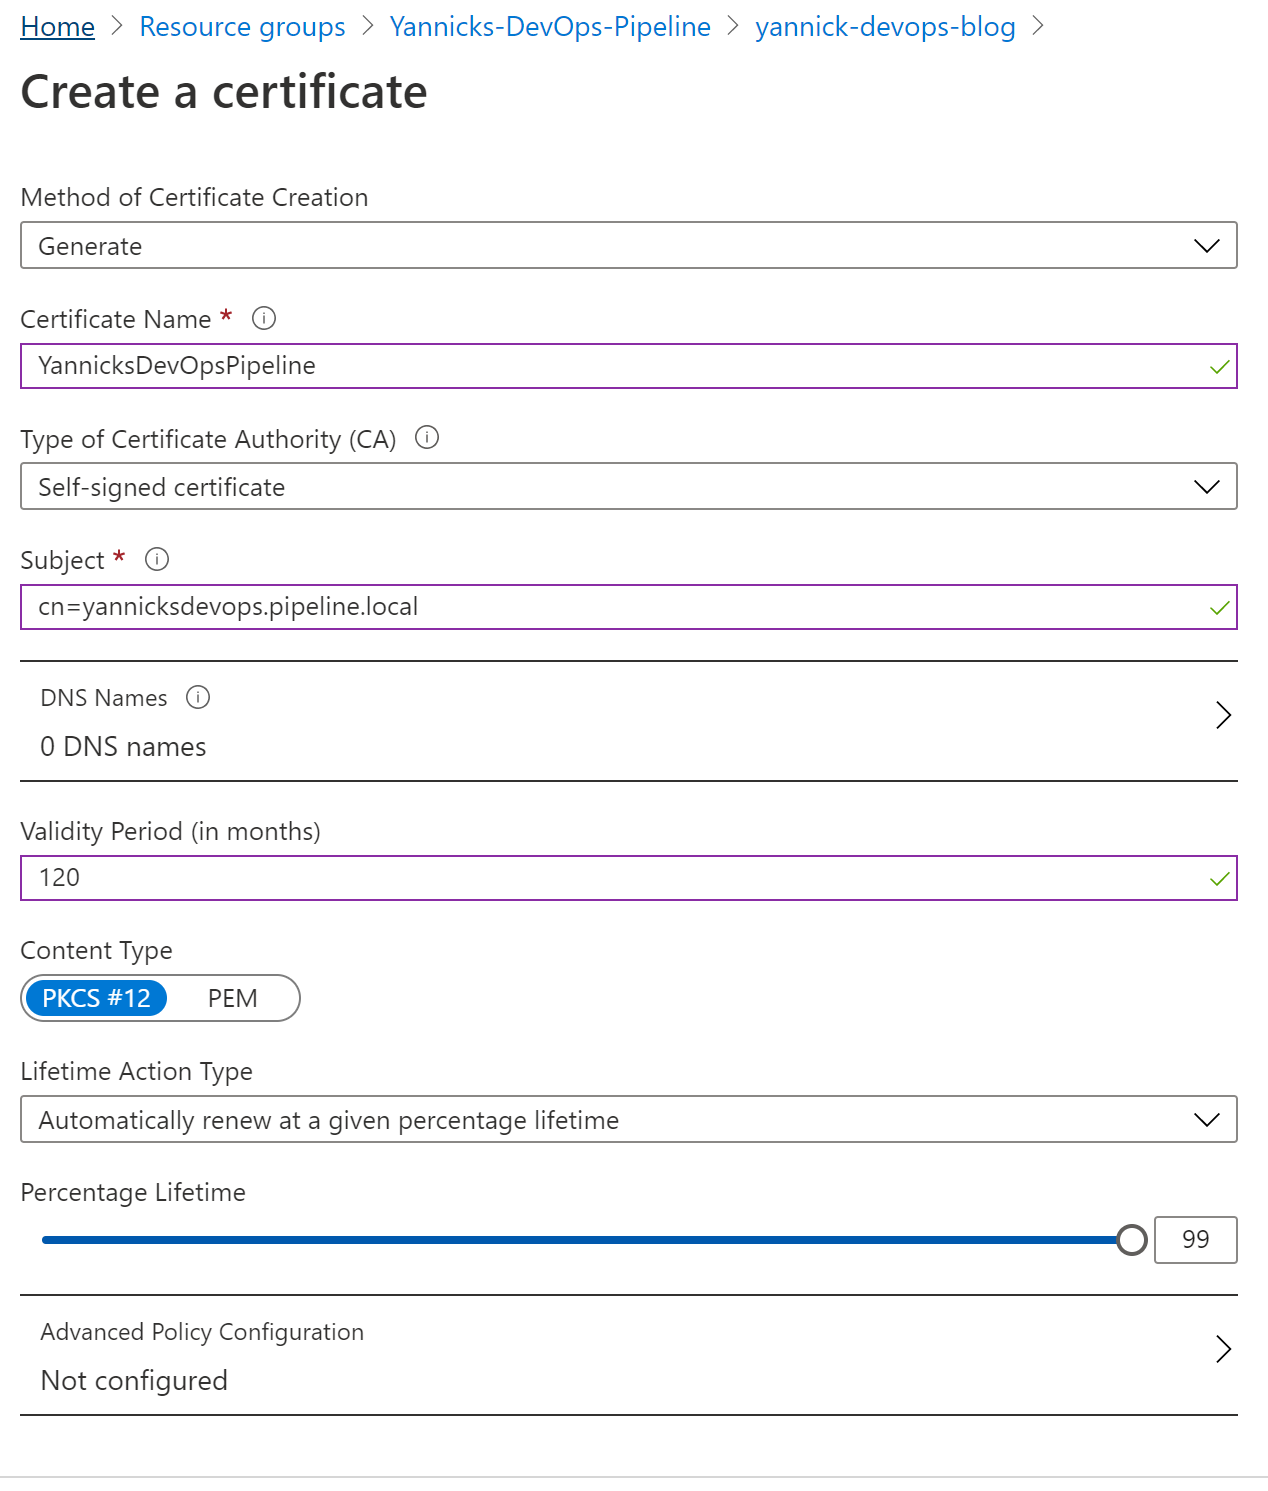
In your Key Vault, go to Certificates and click Generate/Import button. These are the settings I used, but you can choose whatever fits your purpose (or security guidelines):
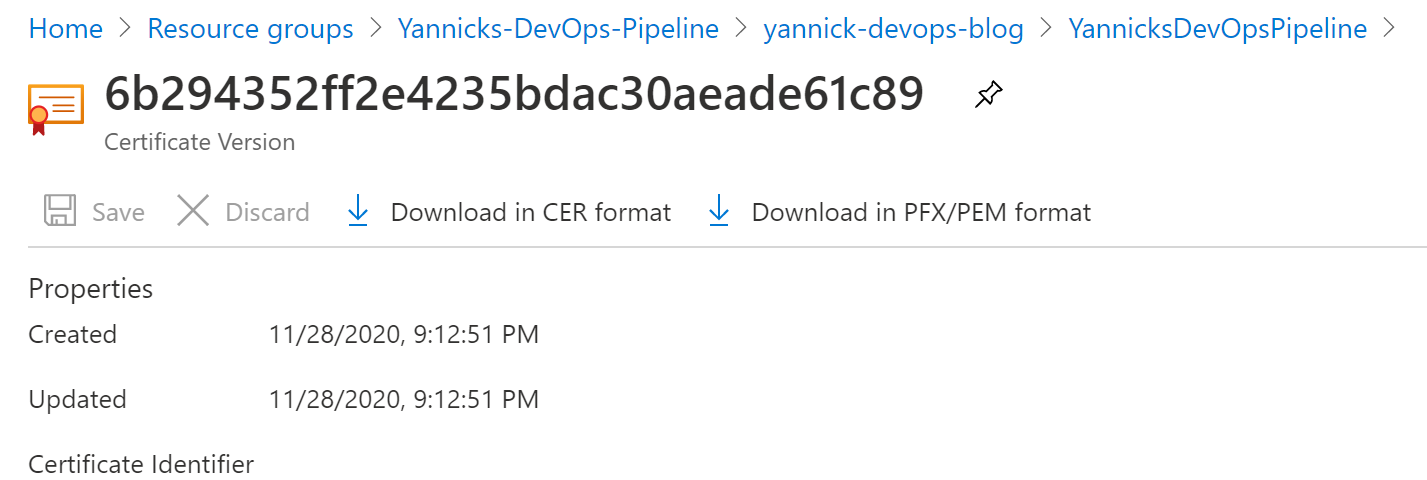
Your certificate will be generated and will show up in the overview list.
Add certificate to Service Principal
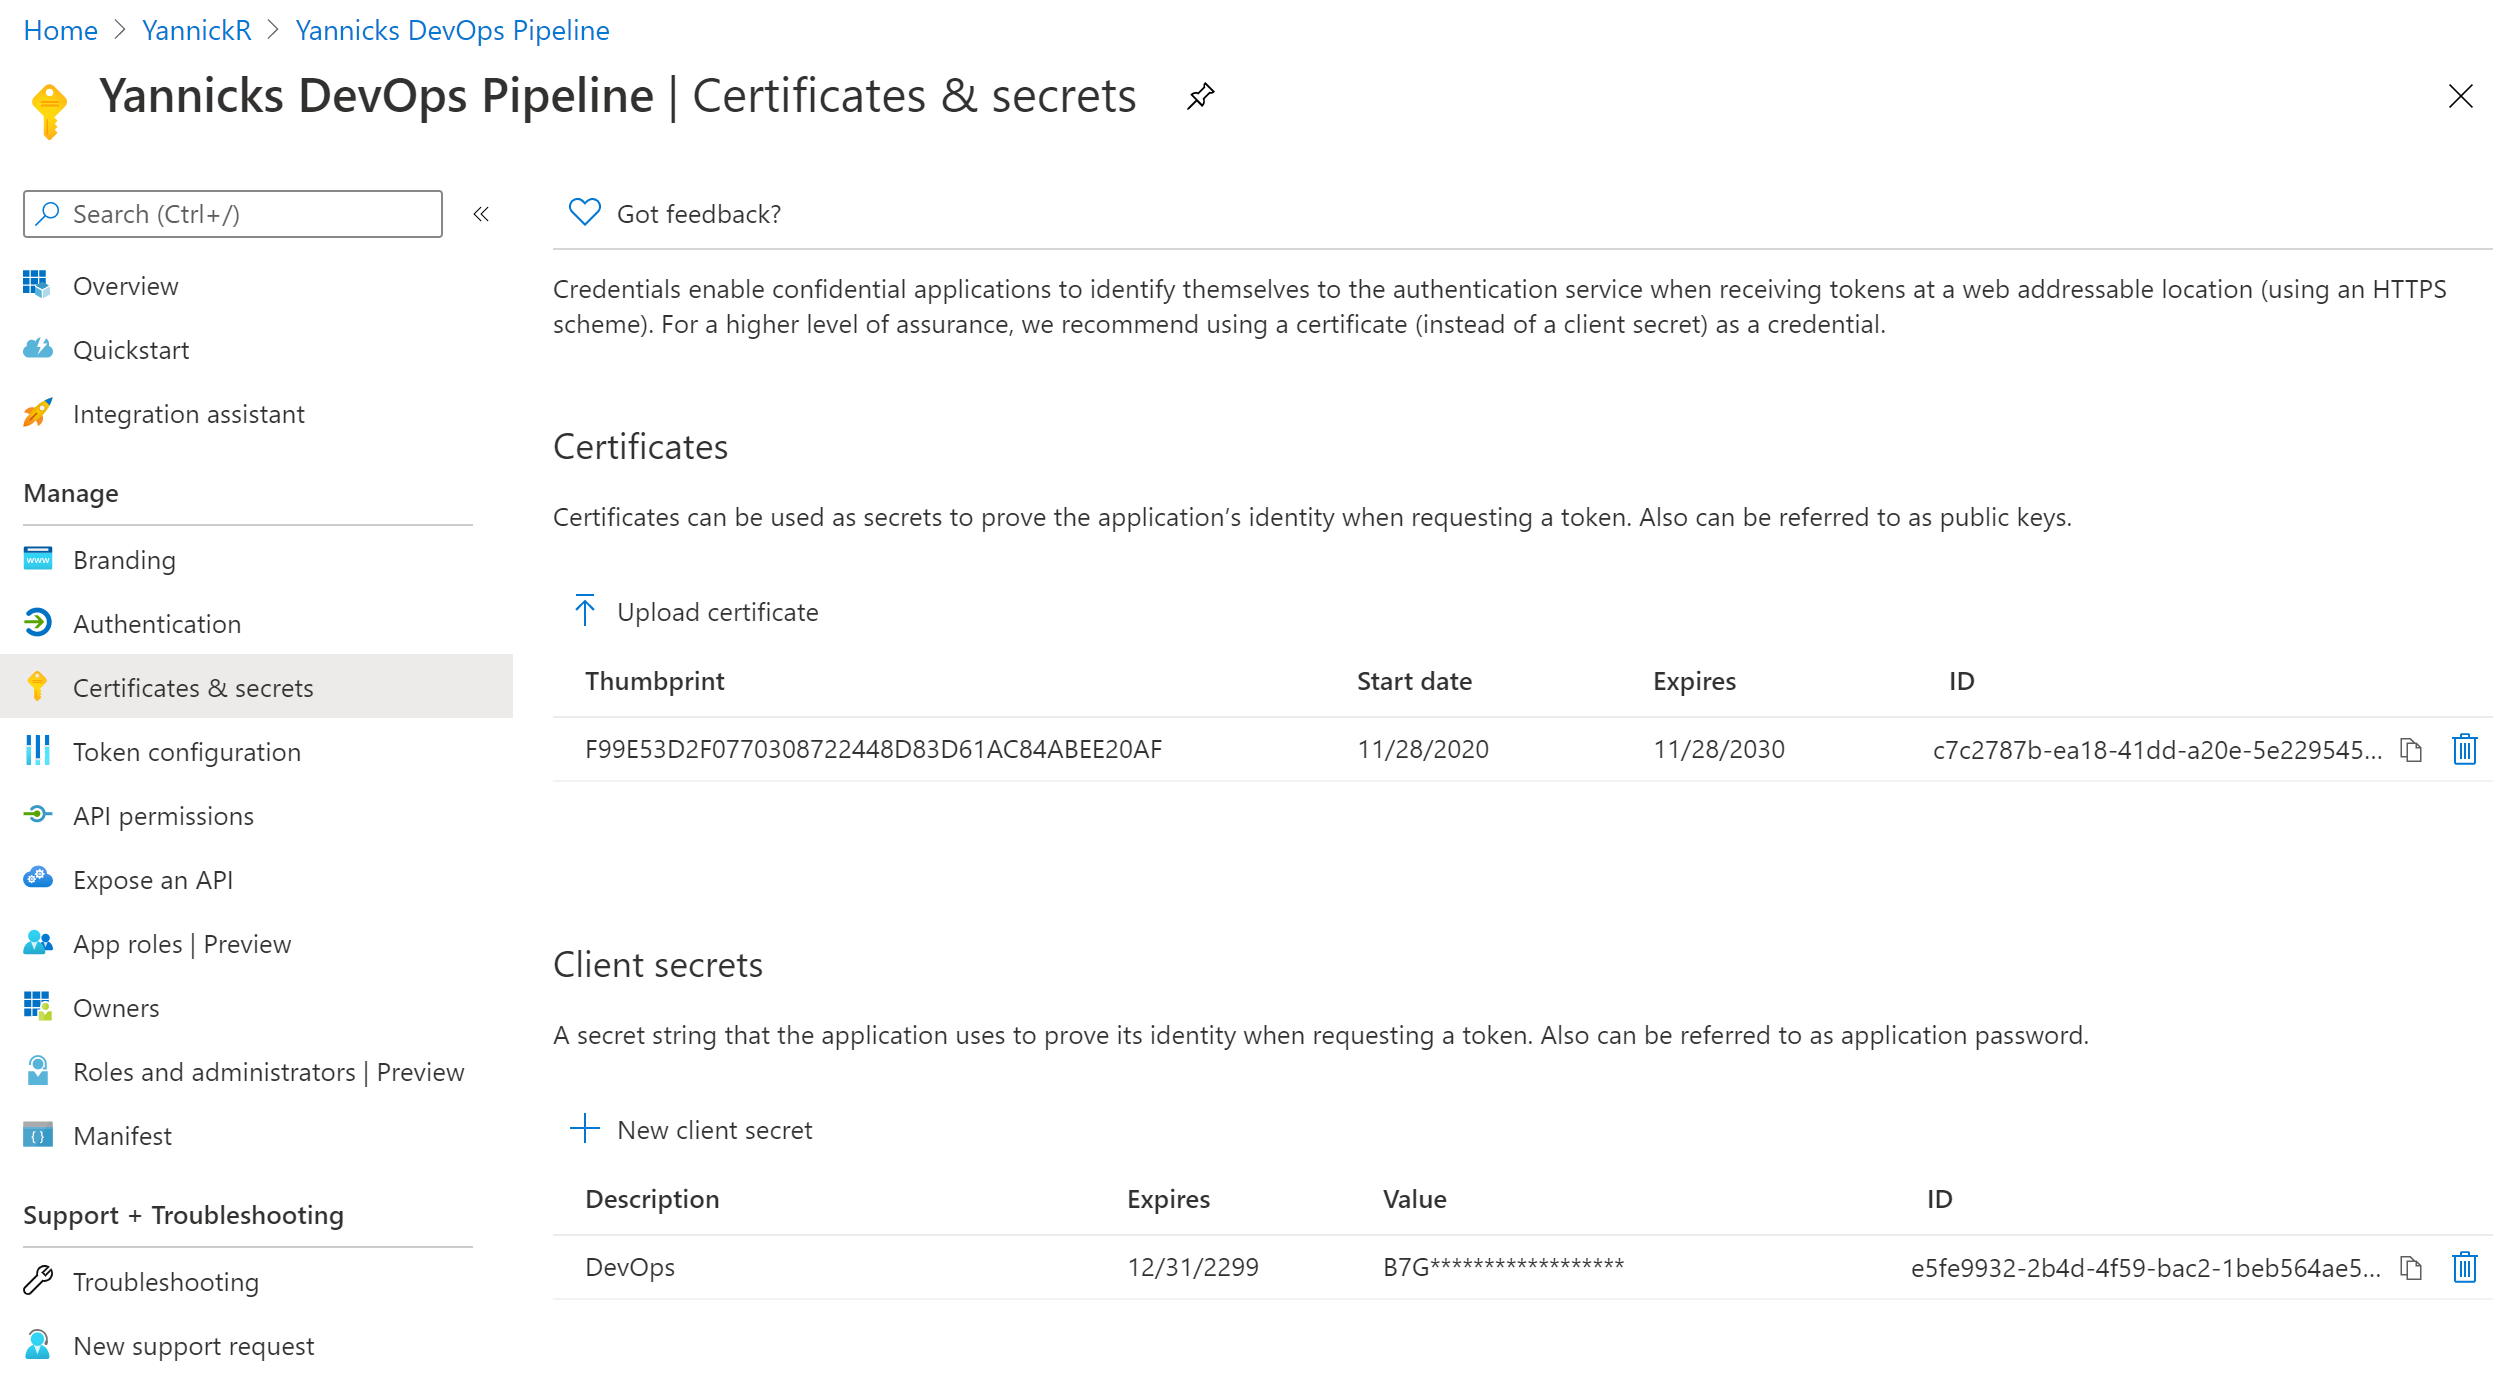
Last step is to assign this certificate to your Service Principal so it can be used in the actual authentication process to Office 365. In the Key Vault, go to Certificates and find your certificate in the list. Click on it and click again to open the latest version. In that last screen, you can download a PFX/PEM version of your certificate.
Go back to Azure Active Directory -> App registrations and find your app in the list, and open it. In the left navigation find "Certificates & Secrets", upload your certificate in there:
Azure DevOps Variable Group
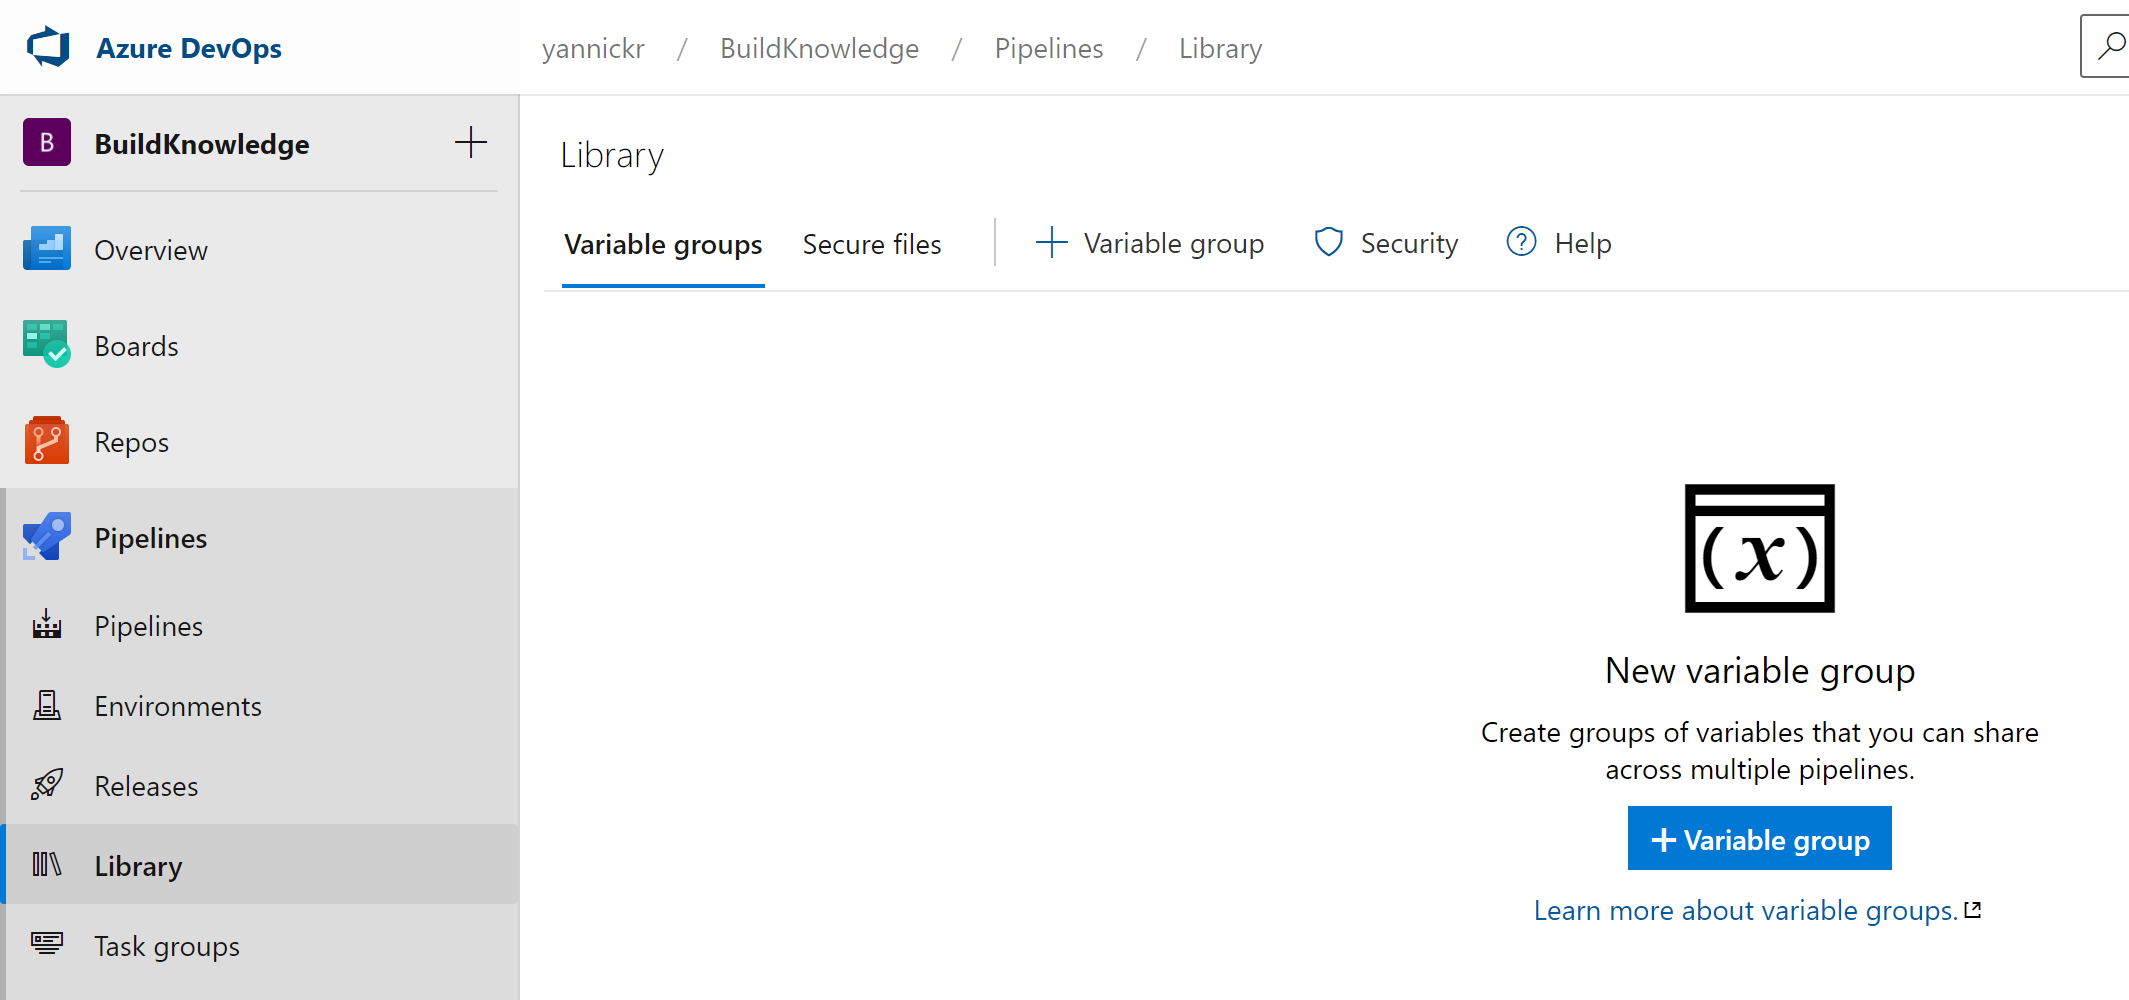
Time to switch over to your Azure DevOps environment and open op the repository where you will run your pipeline. Click open "Pipelines" in the left navigation and select "Library". In there we will create a new Variable Group:
Trick here is to enable the toggle "Link secrets from an Azure Key Vault as variables". You get to select the Service Connection and the key vault containing your certificate:
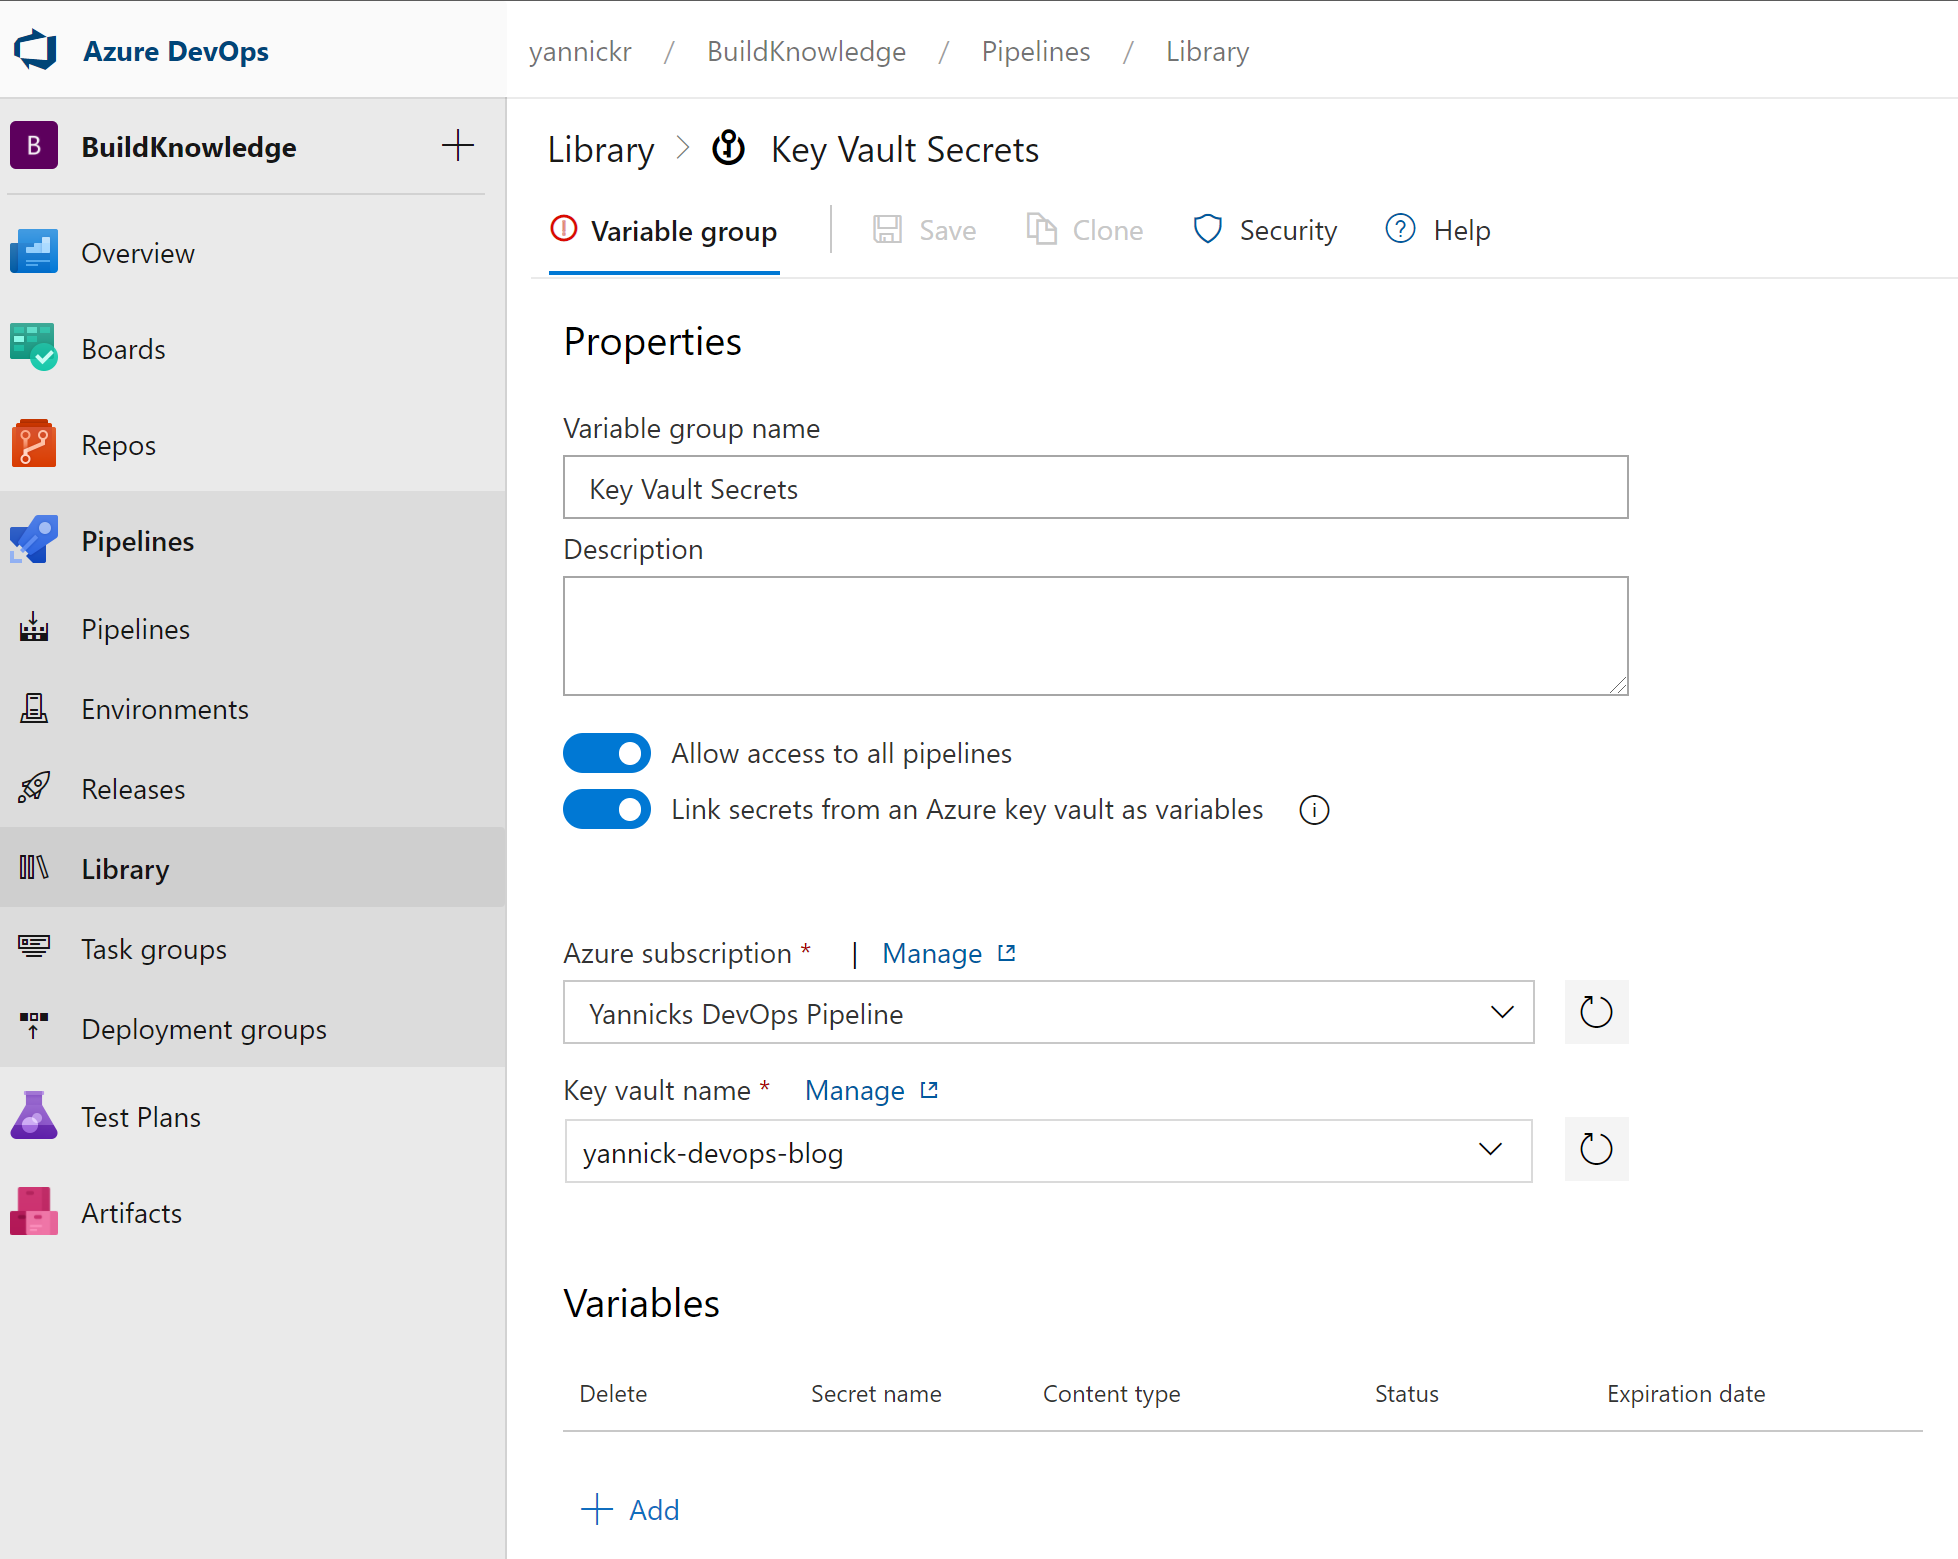
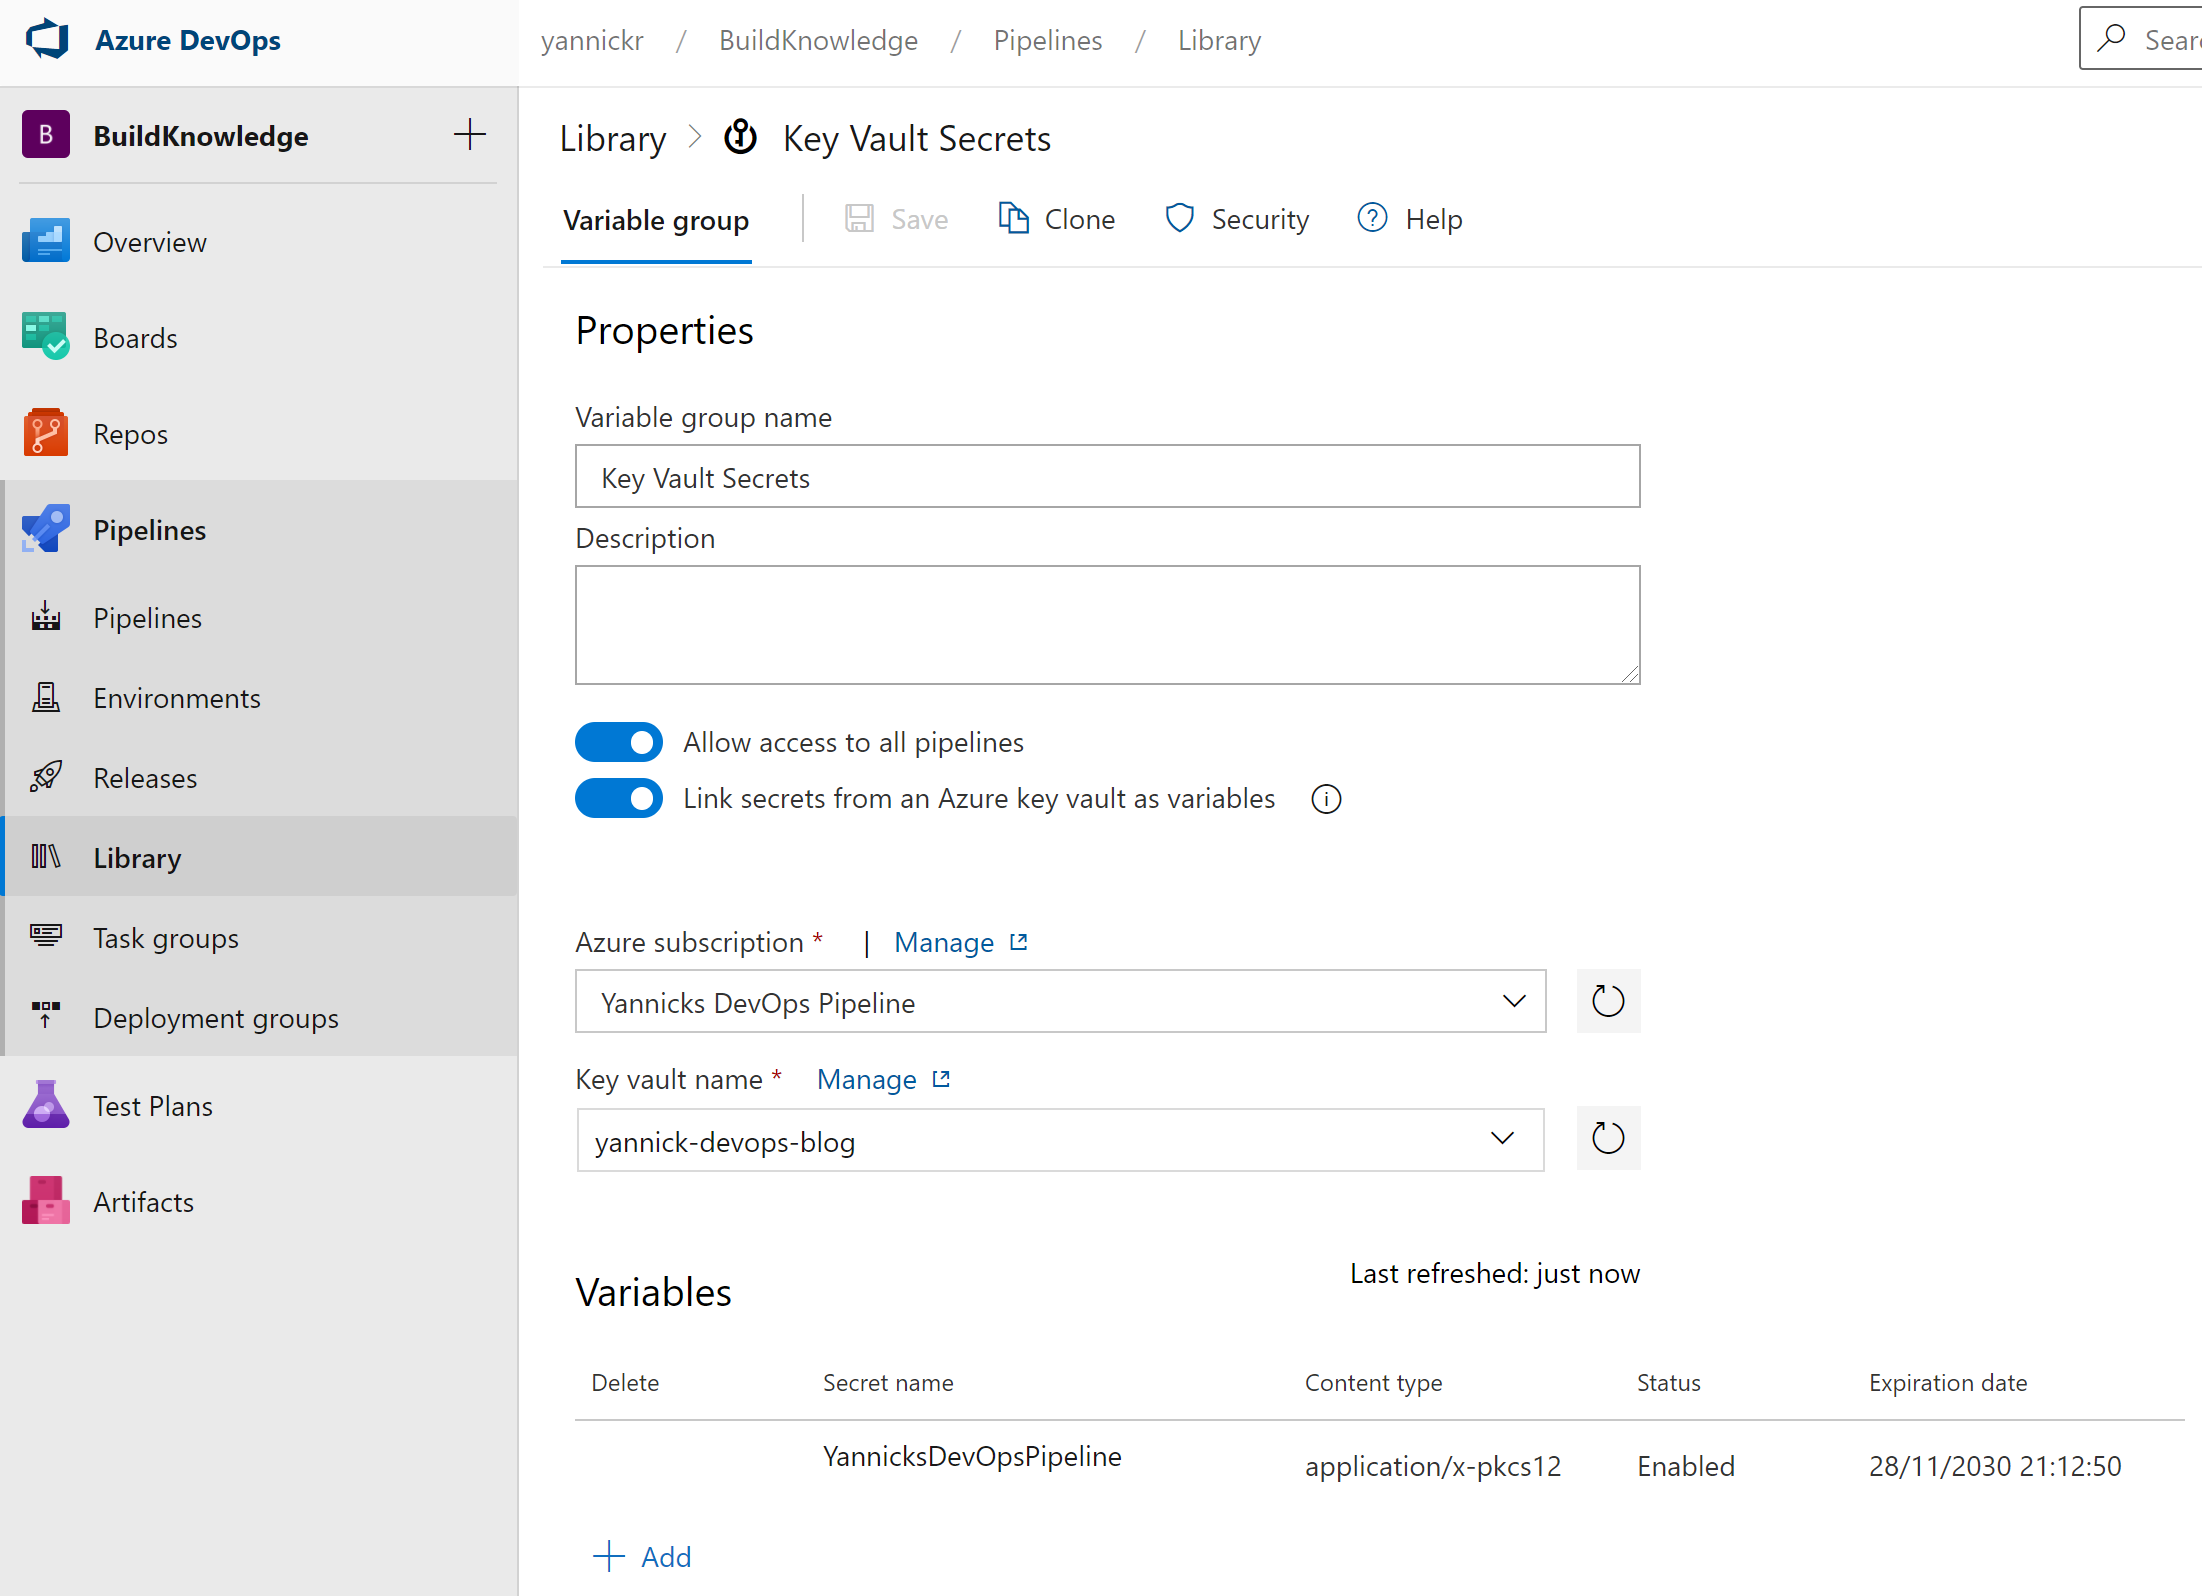
Under "Variables" click "Add". It will show you a list of all secrets and certificates that exist in the Key Vault. From this list, select the certificate we created in one of the previous steps:
Azure DevOps Pipeline
It is finally time to create your YAML-based pipeline. In Azure DevOps, underneath Pipelines, click Pipelines. A button "New pipeline" will be top right. Select where your code lives (I picked Azure Repos Git), and a predefined starter template (I chose "Starter pipeline"). You need to save it before the next steps work.
Start editing your pipeline again and from the menu behind the three dots on the top right, select "Triggers":

On the new screen, switch to the "Variables" tab. It'll show you all available variables, but also an option for "Variable groups". Select it, and now you can finally link our Variable Group from the preparations into this pipeline.
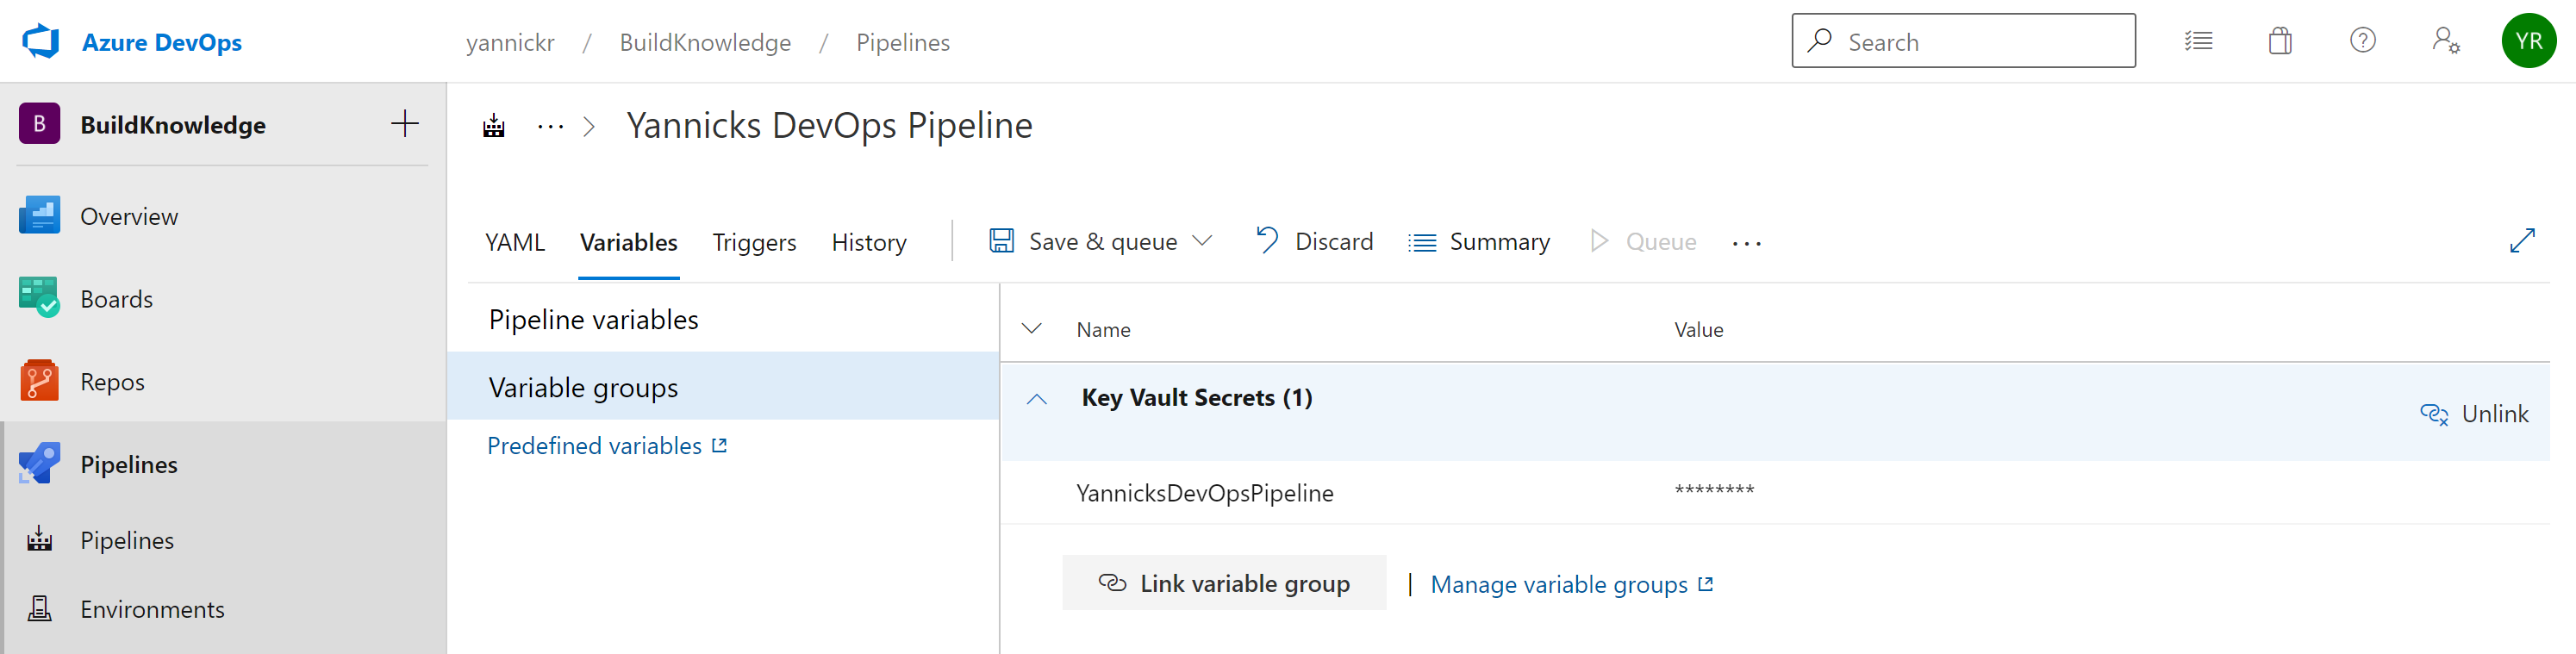
Make sure you click Save in the tab bar. You see that the certificate from the Key Vault is now available as a variable in our pipeline! Let's use it to connect to Office 365 by means of PnP PowerShell and CLI for Microsoft 365.
UPDATE 08/12
You can also achieve this link from directly within the YAML-file, by adding the following snippet:
variables:
- group: "Key Vault Secrets"
PnP PowerShell
I decided to use the new PowerShell Core version of PnP PowerShell, currently in preview and slated for a GA release very soon. In my YAML pipeline I added a PowerShell task, made sure I selected to use PowerShell Core and used the inline mode for my script:
- task: PowerShell@2
  inputs:
    targetType: 'inline'
    script: |
      # Write your PowerShell commands here.

      Write-Host "Hello World"
    pwsh: true
I added the installation of the PnP.PowerShell module in there, and opened the connection to my SharePoint site. This is where the magic happens: I provide the clientId and the tenantId of my Azure AD application/Service principal that we prepared. The last parameter is -CertificateBase64Encoded, and there I pass the variable from the linked Variable Group which fetches the data from my Azure Key Vault.
This results in the following task:
- task: PowerShell@2
  inputs:
    targetType: 'inline'
    script: |
      Install-Module PnP.PowerShell -AllowPrerelease -Scope "CurrentUser" -Verbose -AllowClobber -Force
      Connect-PnPOnline -Url https://contoso.sharepoint.com/sites/crisismanagement -ClientId e5c08ad8-0017-xxxx-xxxx-a266c94bc638 -Tenant b868e8f4-xxxx-xxxx-8c95-7f432eba848b -CertificateBase64Encoded $(YannicksDevOpsPipeline)
      $web = Get-PnPWeb
      Write-Host "Site title: $($web.Title)"
    pwsh: true
For demo purposes I just fetch the title of the site in SharePoint, but in my actual pipeline I install an SPFx application into the app catalog. And all of this without having secrets or certificates exposed anywhere!
CLI for Microsoft 365
What PnP PowerShell can do, can also be done with CLI for Microsoft 365 albeit a little (a lot?) more complicated.
I once again start with a PowerShell Core task, where I put everything inline. This is because we need to do some transformation on our base64 encoded certificate. The final steps would be this:
- task: NodeTool@0
  inputs:
    versionSpec: '12.x'
- task: PowerShell@2
  inputs:
    targetType: 'inline'
    script: |
      $location = Get-Location
      $certStringBase64 = "$(YannicksDevOpsPipeline)"
      $certByteArray = [System.Convert]::FromBase64String($certStringBase64)

      [System.IO.File]::WriteAllBytes("$location/certificate.pfx", $certByteArray)
      $cert = [System.Security.Cryptography.X509Certificates.X509Certificate2]($certByteArray)
      $certThumbprint = $cert.Thumbprint
      $cert.Dispose()
      $cert = $null

      openssl pkcs12 -in "$location/certificate.pfx" -out "$location/certificate.pem" -nodes -passin pass:

      npm i -g @pnp/cli-microsoft365
      $env:CLIMICROSOFT365_AADAPPID = "e5c08ad8-xxxx-xxxx-b429-a266c94bc638"
      $env:CLIMICROSOFT365_TENANT = "b868e8f4-xxxx-xxxx-8c95-7f432eba848b"
      m365 login --authType certificate --certificateFile "$location/certificate.pem" --thumbprint $certThumbprint
      m365 spo web get --webUrl https://contoso.sharepoint.com/sites/crisismanagement
      m365 logout

      Remove-Item "$location/certificate.pfx"
      Remove-Item "$location/certificate.pem"
    pwsh: true
Firstly we make sure to use Node 12, as this is the required version to use CLI for Microsoft 365, after that we do the following actions in the PowerShell task:
- Get the current location of the PowerShell execution
- Fetch the certificate as base64 encoded
- Convert the base64 encoded certificate to byte array
- Write the byte array certificate to disk as a .pfx
- Open the byte array certificate as an X509Certificate2 object in memory
- Store the certificate thumbprint and dispose of the object in memory
- Use
openssltool to convert the the .pfx to a .pem certificate file, containing the private key and passing in an empty import password.
This is necessary because CLI for M365 doesn't accept an empty password for an .pfx file, and leaving out the parameter assumes it to be a .pem file. - Install CLI for Microsoft 365
- Load clientId and tenantId of your application in memory for CLI to use, instead of using their default information
- Log in by using the .pem file and the stored certificate thumbprint
- Load some data from Office 365
- Log out from CLI
- Remove the stored certificates from disk
As you can see, this process is a lot more complex than when you'd use PnP PowerShell but the end result is the same: an app-only connection to Office 365 without exposing secrets or certificates!
Conclusion
Using both PnP.PowerShell and CLI for Microsoft 365 it is possible to do app-only, unattended authentication to your Office 365 tenant and execute the necessary actions. Combine this with Variable Groups that connect to your Azure Key Vault, and you've got yourself a very secure pipeline.
At this time, it is a bit easier with PnP.Powershell but with some changes to CLI for Microsoft 365 it could be simplified too:
- Most of the additional steps can be skipped if they allow direct usage of the base64 encoded certificate. (Feature request)
- Don't pass in the
--thumbprintparameter but derive it from the passed in certificate. (Feature request) - Allow passing in an empty password when providing a .pfx file. (Feature request)
- Allow the
m365 logincommand to accept clientId and tenantId as a parameter, so it doesn't depend on environment variables. (Feature request)
UPDATE 10/12: if you need these improvements for CLI in your pipeline, please read the follow-up blogpost!